Stevil’s Adepticon Terrain Board Build
Our Miniatures Master, Stevil, is a man of many talents. Recently asked to build a terrain board for a Warhammer: Age of Sigmar campaign called Kyngsvood, Stevil accepted the challenge. The campaign will be run using Stevil’s board at Adepticon 2023. He shared with us his process and some tips along the way which we’re excited to share with all of you!
The Setting of the Board
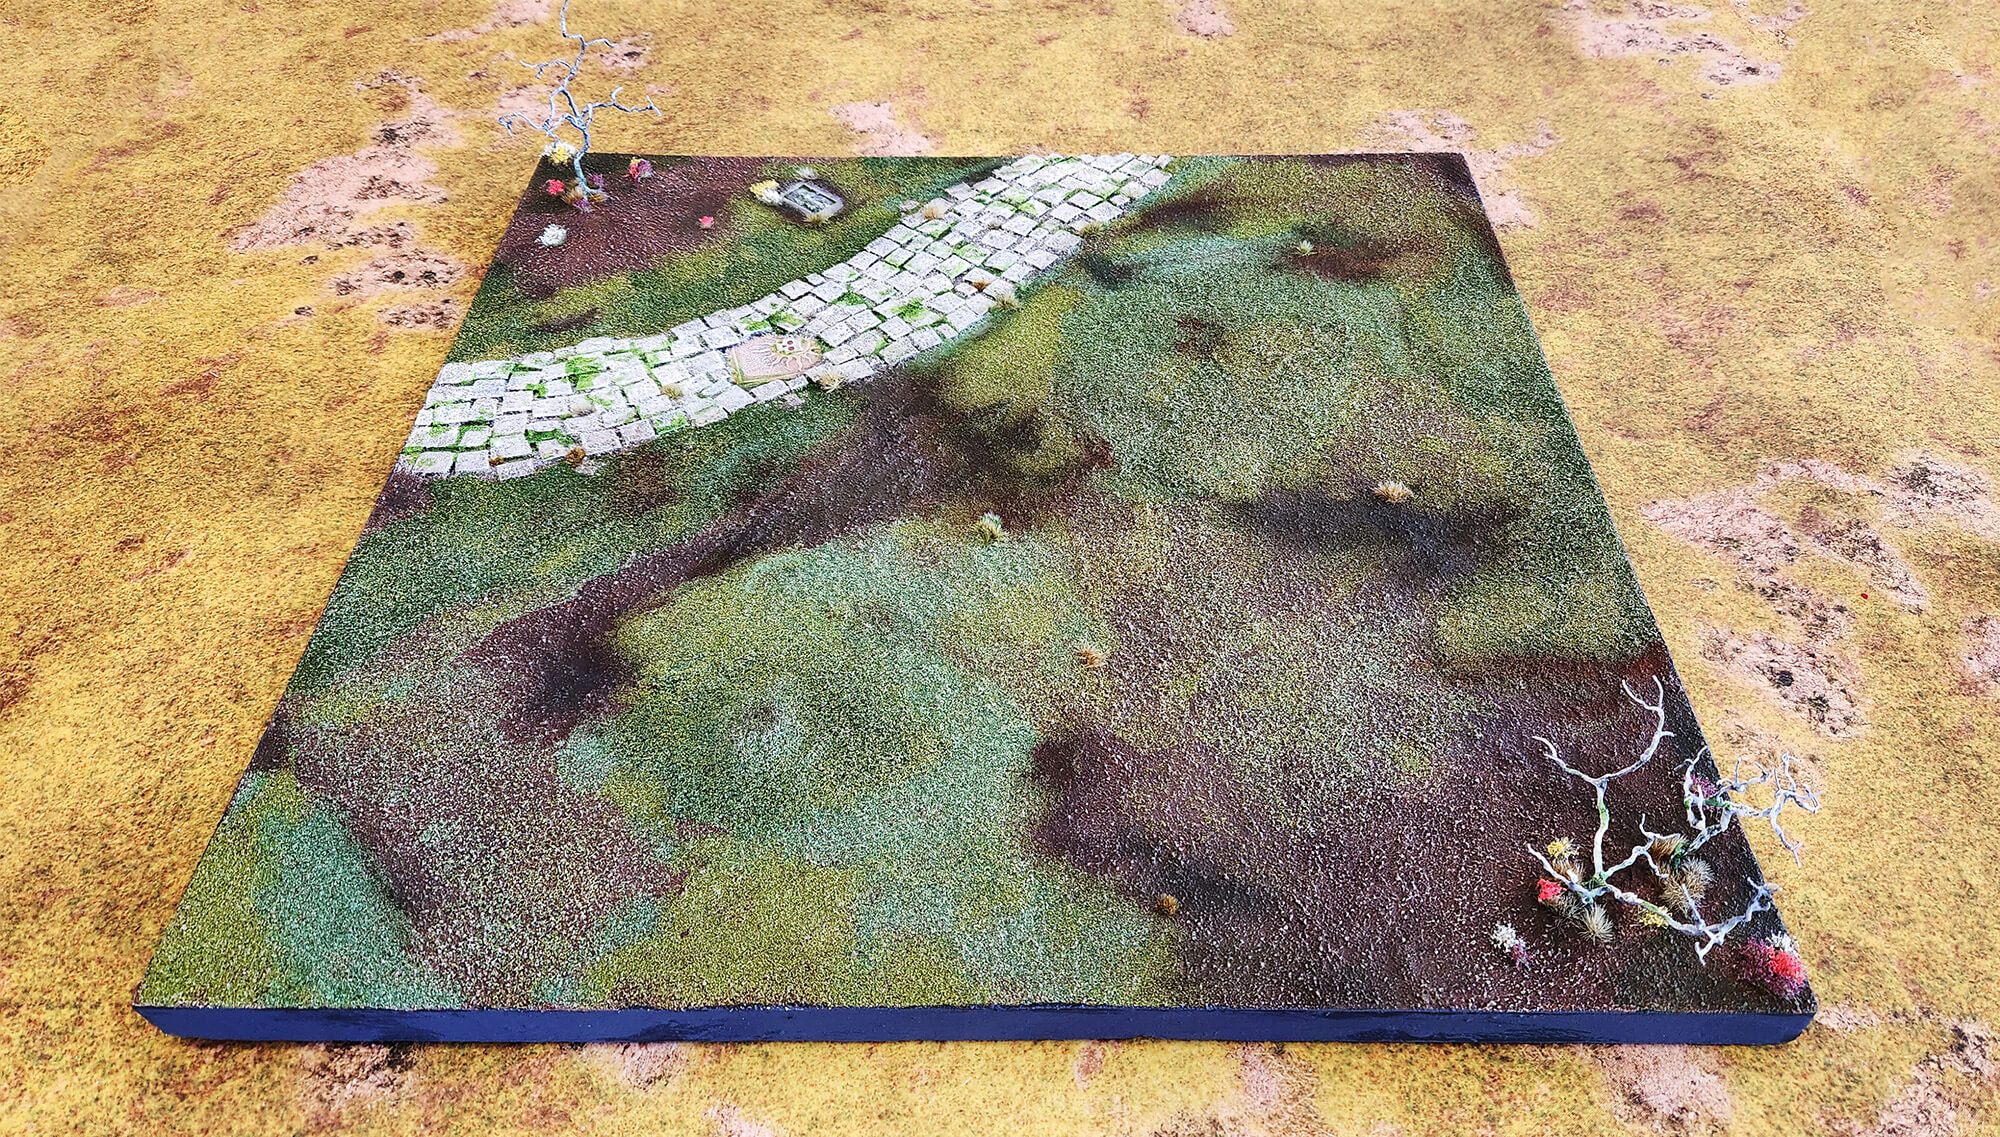
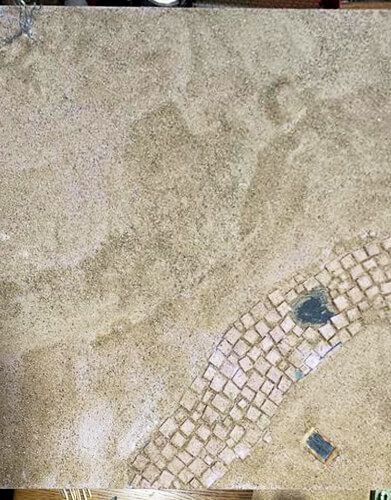
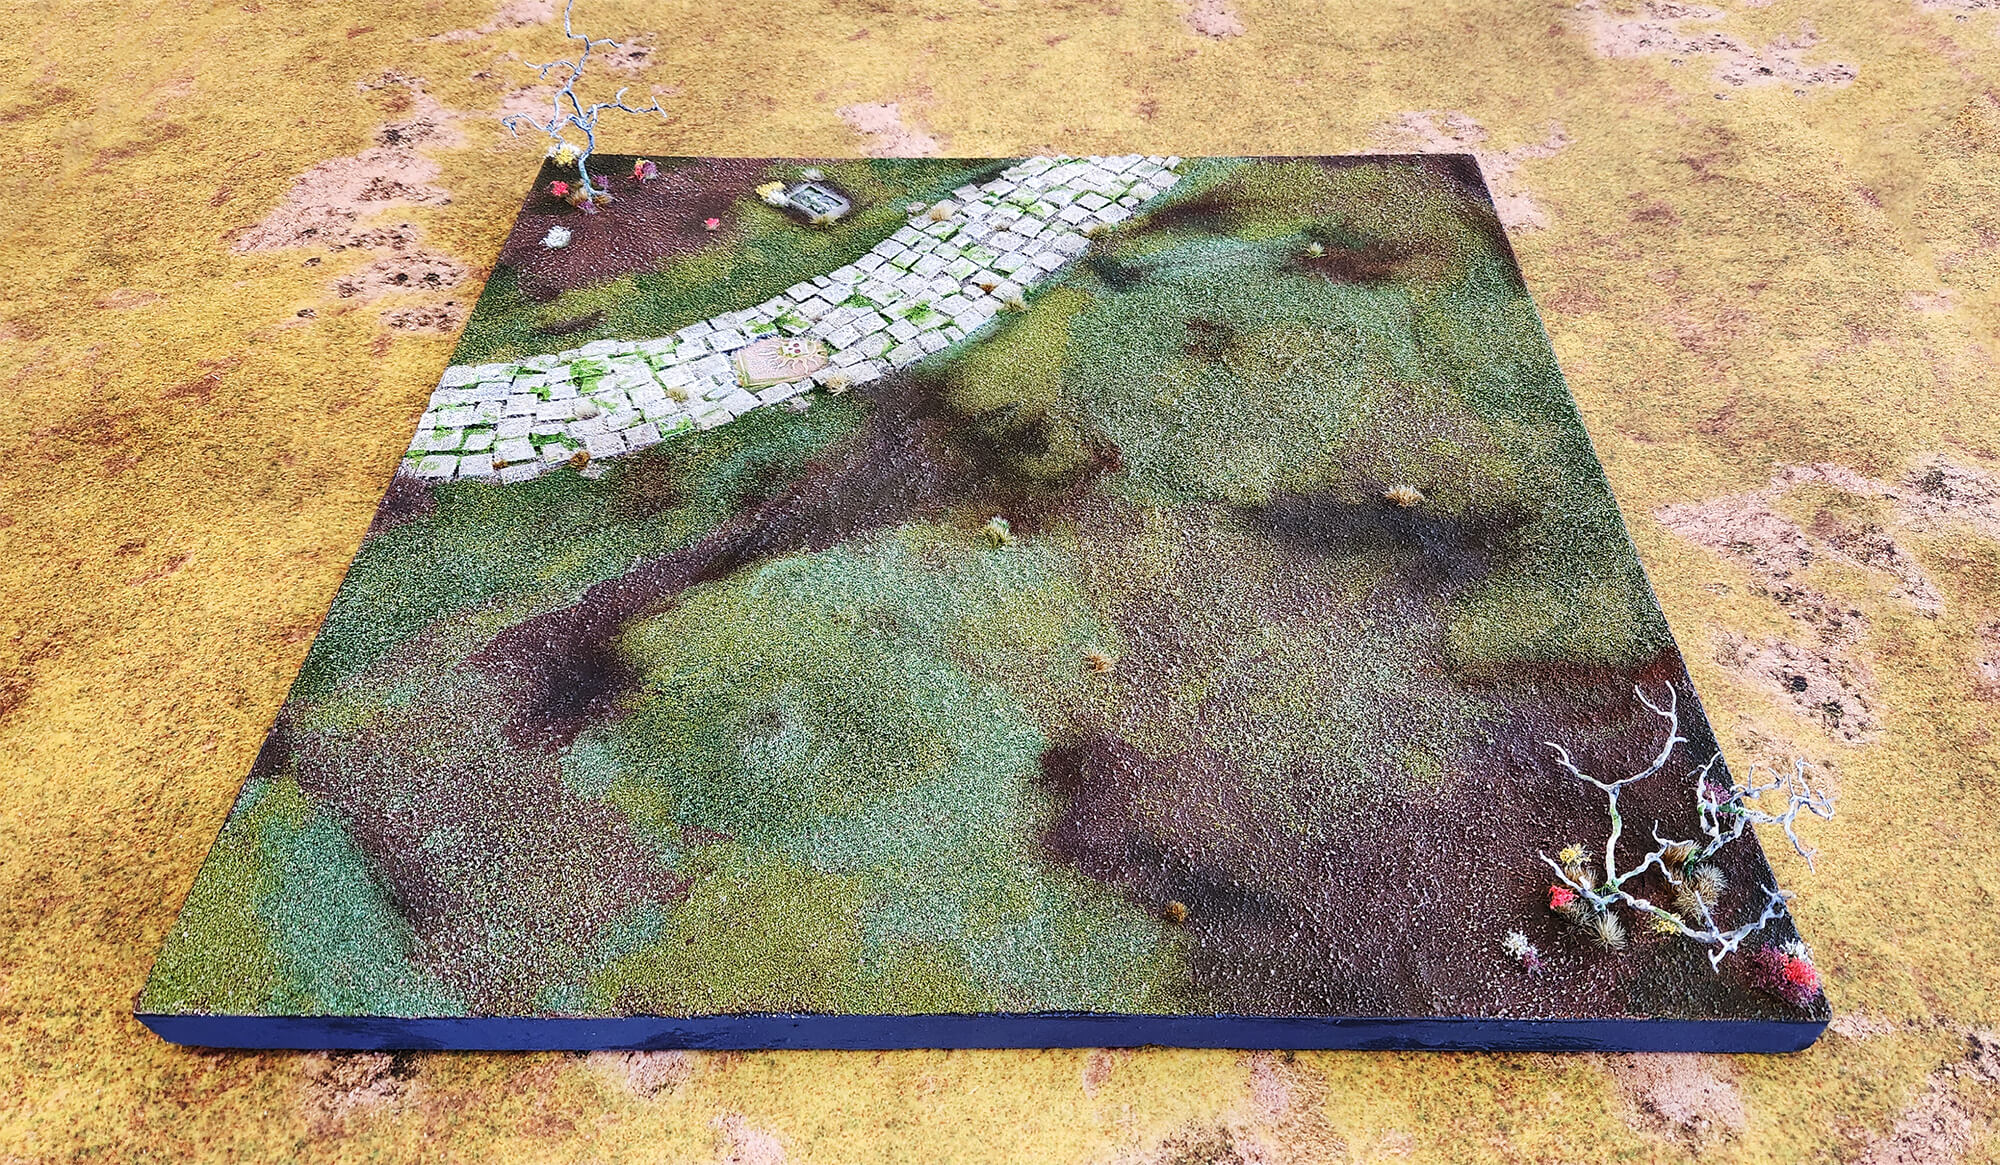
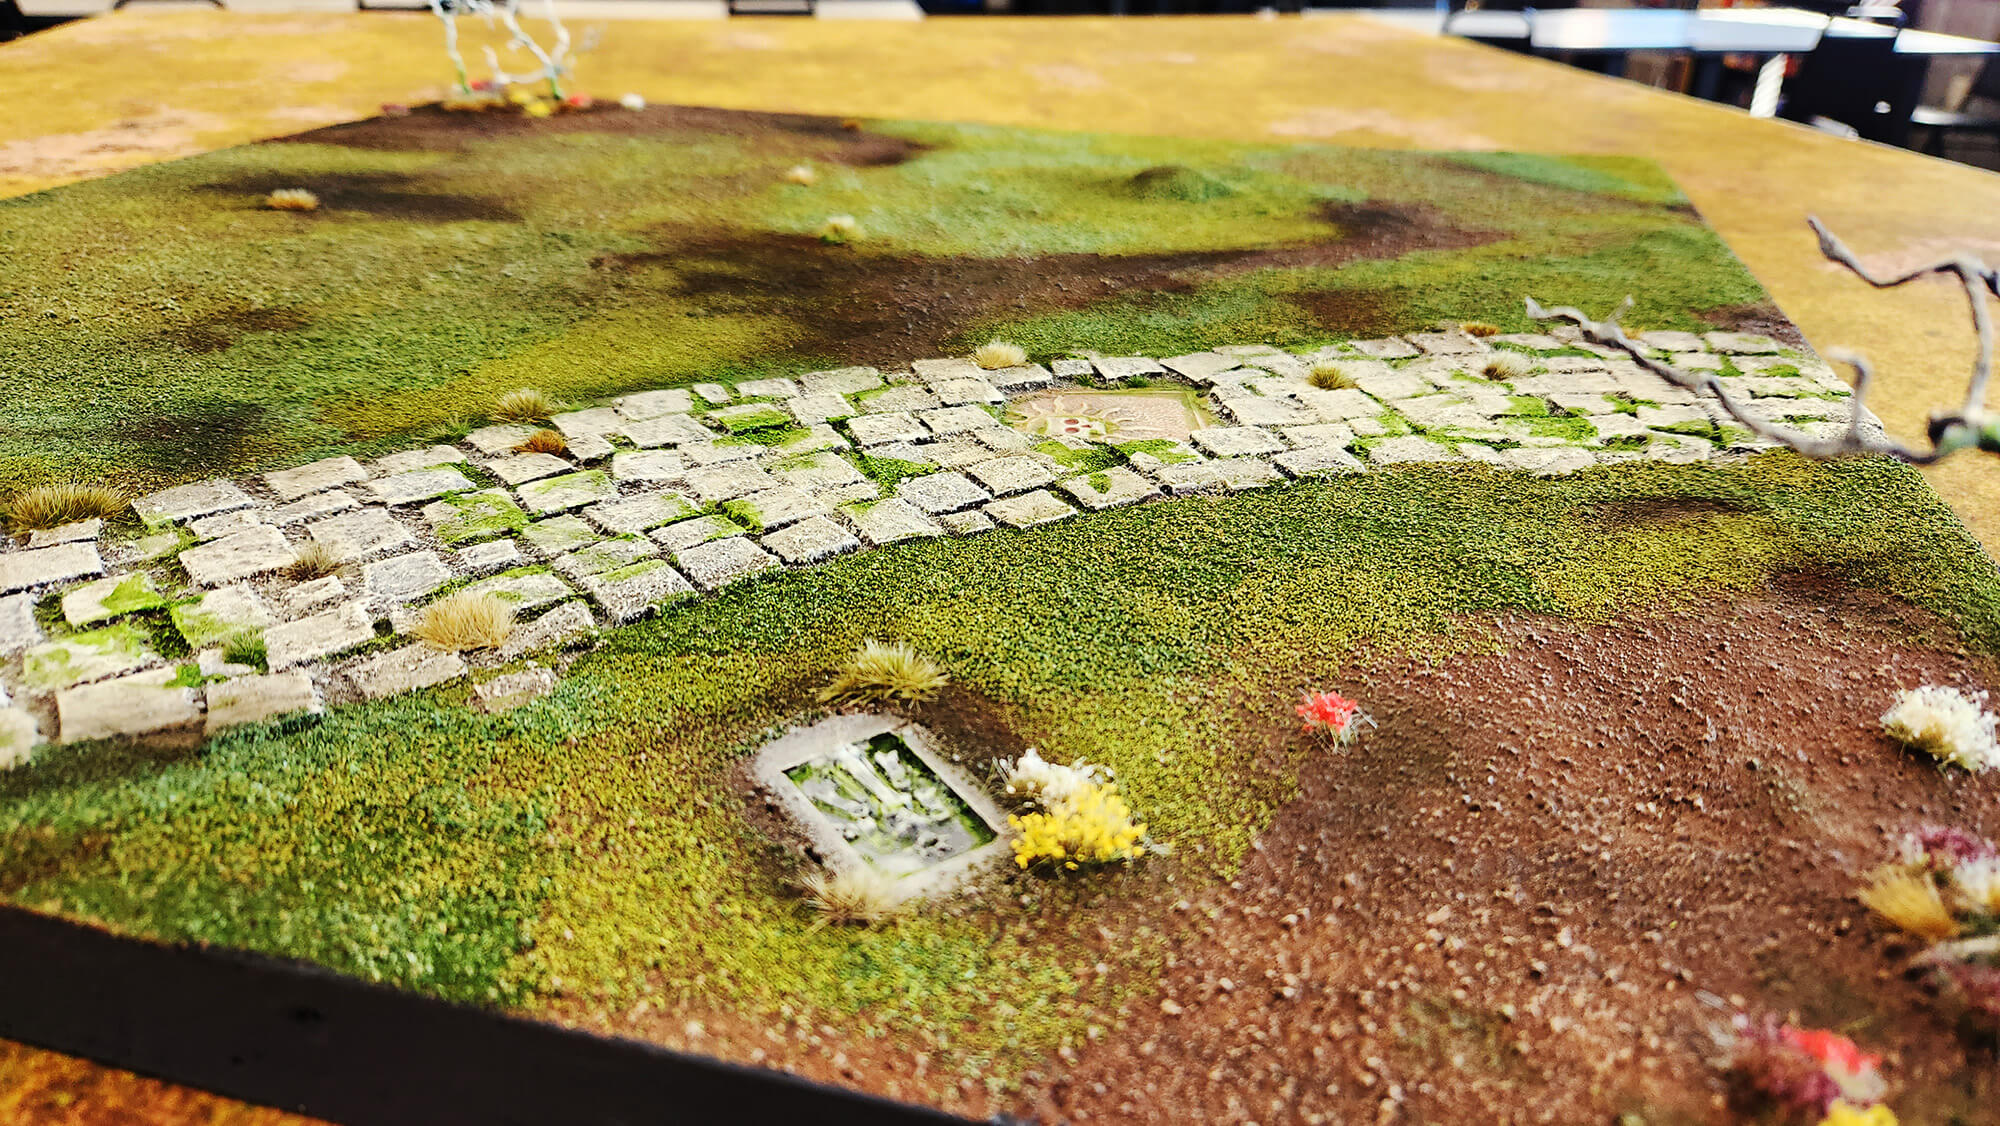
At it’s most basic, the task was to create terrain of a clearing within a forest. The scene depicts a secret forest area where fantastic beasts have been brought for poachers to hunt in a competition. Stevil added a path with piecemeal stonework made to look weathered and as if it had been hauled in and haphazardly dropped off over years. He also added some gnarly dead trees and the grave of a fallen poacher. These elements give the board more visual interest while still allowing for plenty of room for the combat to take place.
Let’s get into the nitty gritty of how he put this beautiful piece together, and what he used to do it. Take it away, Stevil!
Supplies Used
- 2’x2’x1″ XPS foam board
- Some additional scraps of XPS foam for stonework and mound features
- Knife
- Olfa utility knife
- Brushes — various sizes
- Glue
- Carpenter’s glue
- PVA glue
- Super glue
- Each application of carpenter’s glue and PVA took about 24 hours to dry properly
- Fine sand
- Aluminum foil
- Baking soda
- White flour
- Cheap craft paints
- Black, mid-tone brown, burnt umber, ivory, light grey, tangerine, tan, cream
- A wash
- Mixed black ink, peat ink, matte medium, water, drop of dish soap
- Dirty Down Moss from Goblins Hut
- Green Grass flock from Woodland Scenics
- Green Grass flock & tufts from The Army Painter
- Flower tufts from Green Stuff World
- Pigment powders & tufts from Huge Miniatures
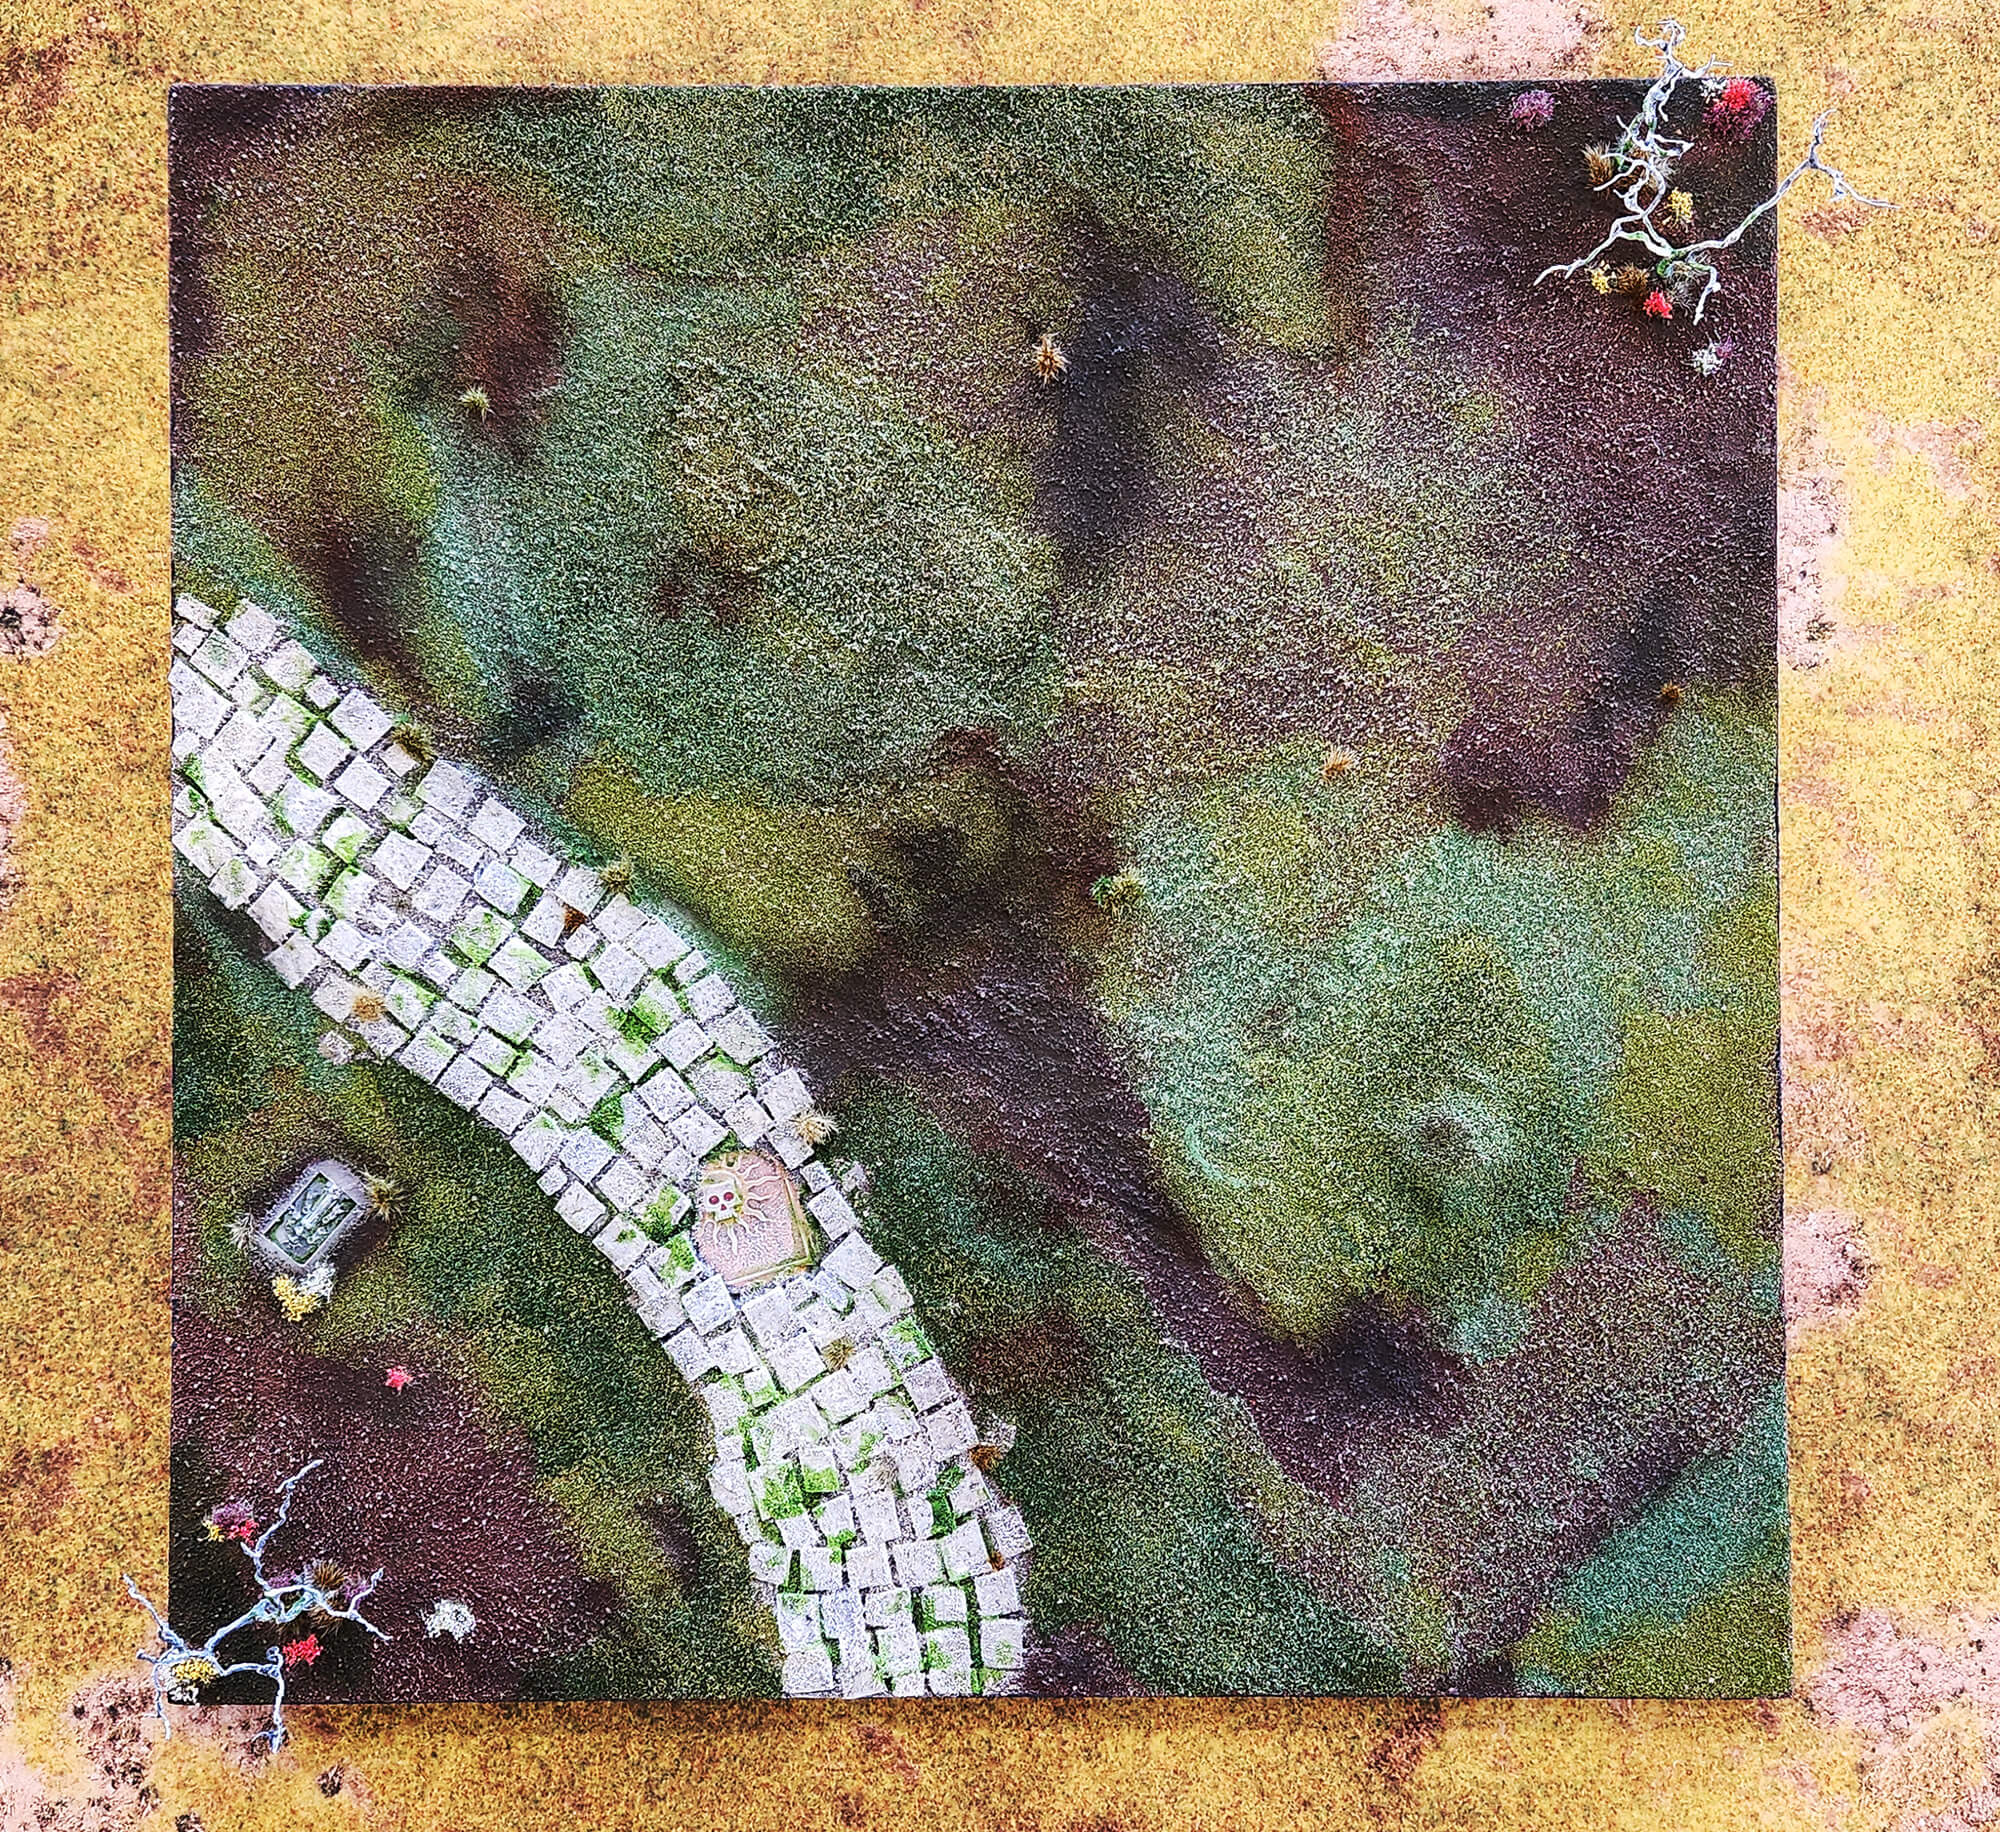
The Grave
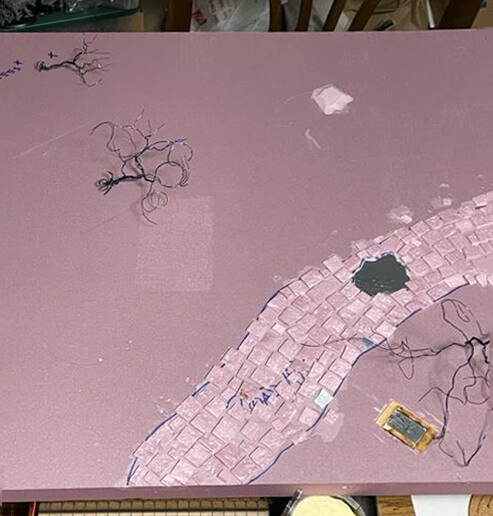
First up, I cut a recess for the grave into the top of the 2’x2’x1″ XPS foam board with the utility knife. For the grave itself, I trimmed some of the more “tech-y” bits off of a piece of a Games Workshop terrain kit. To create a framework for it, a few pieces of wood from a TTCombat terrain kit worked well.
I used carpenter’s glue to keep all these pieces in place. It’s a little thicker than PVA glue and has a good, strong bond. Plus, if any blobs of glue squeezed through, they would be hidden by the texturing later.
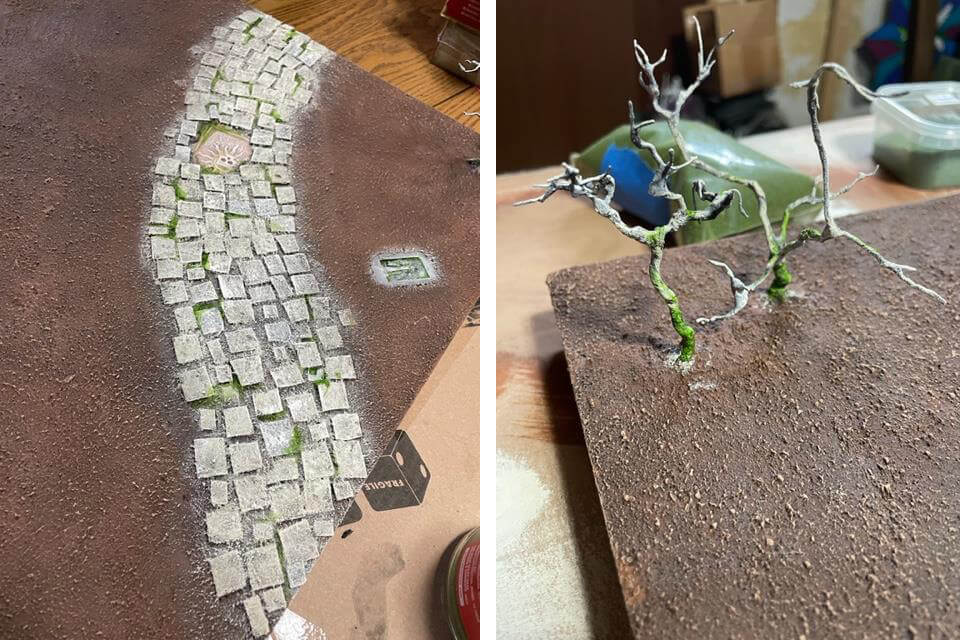
The Path
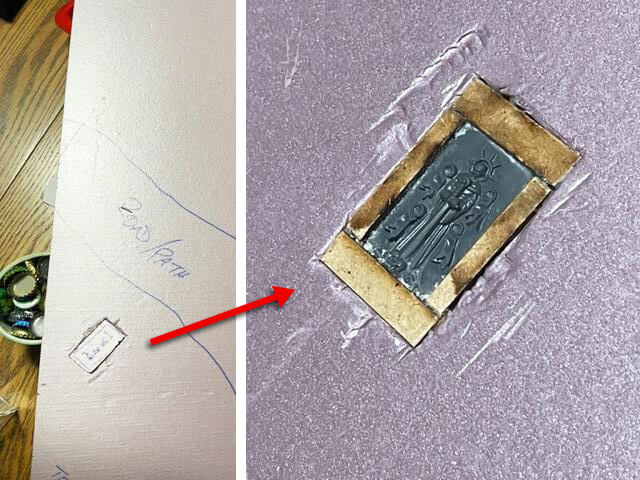
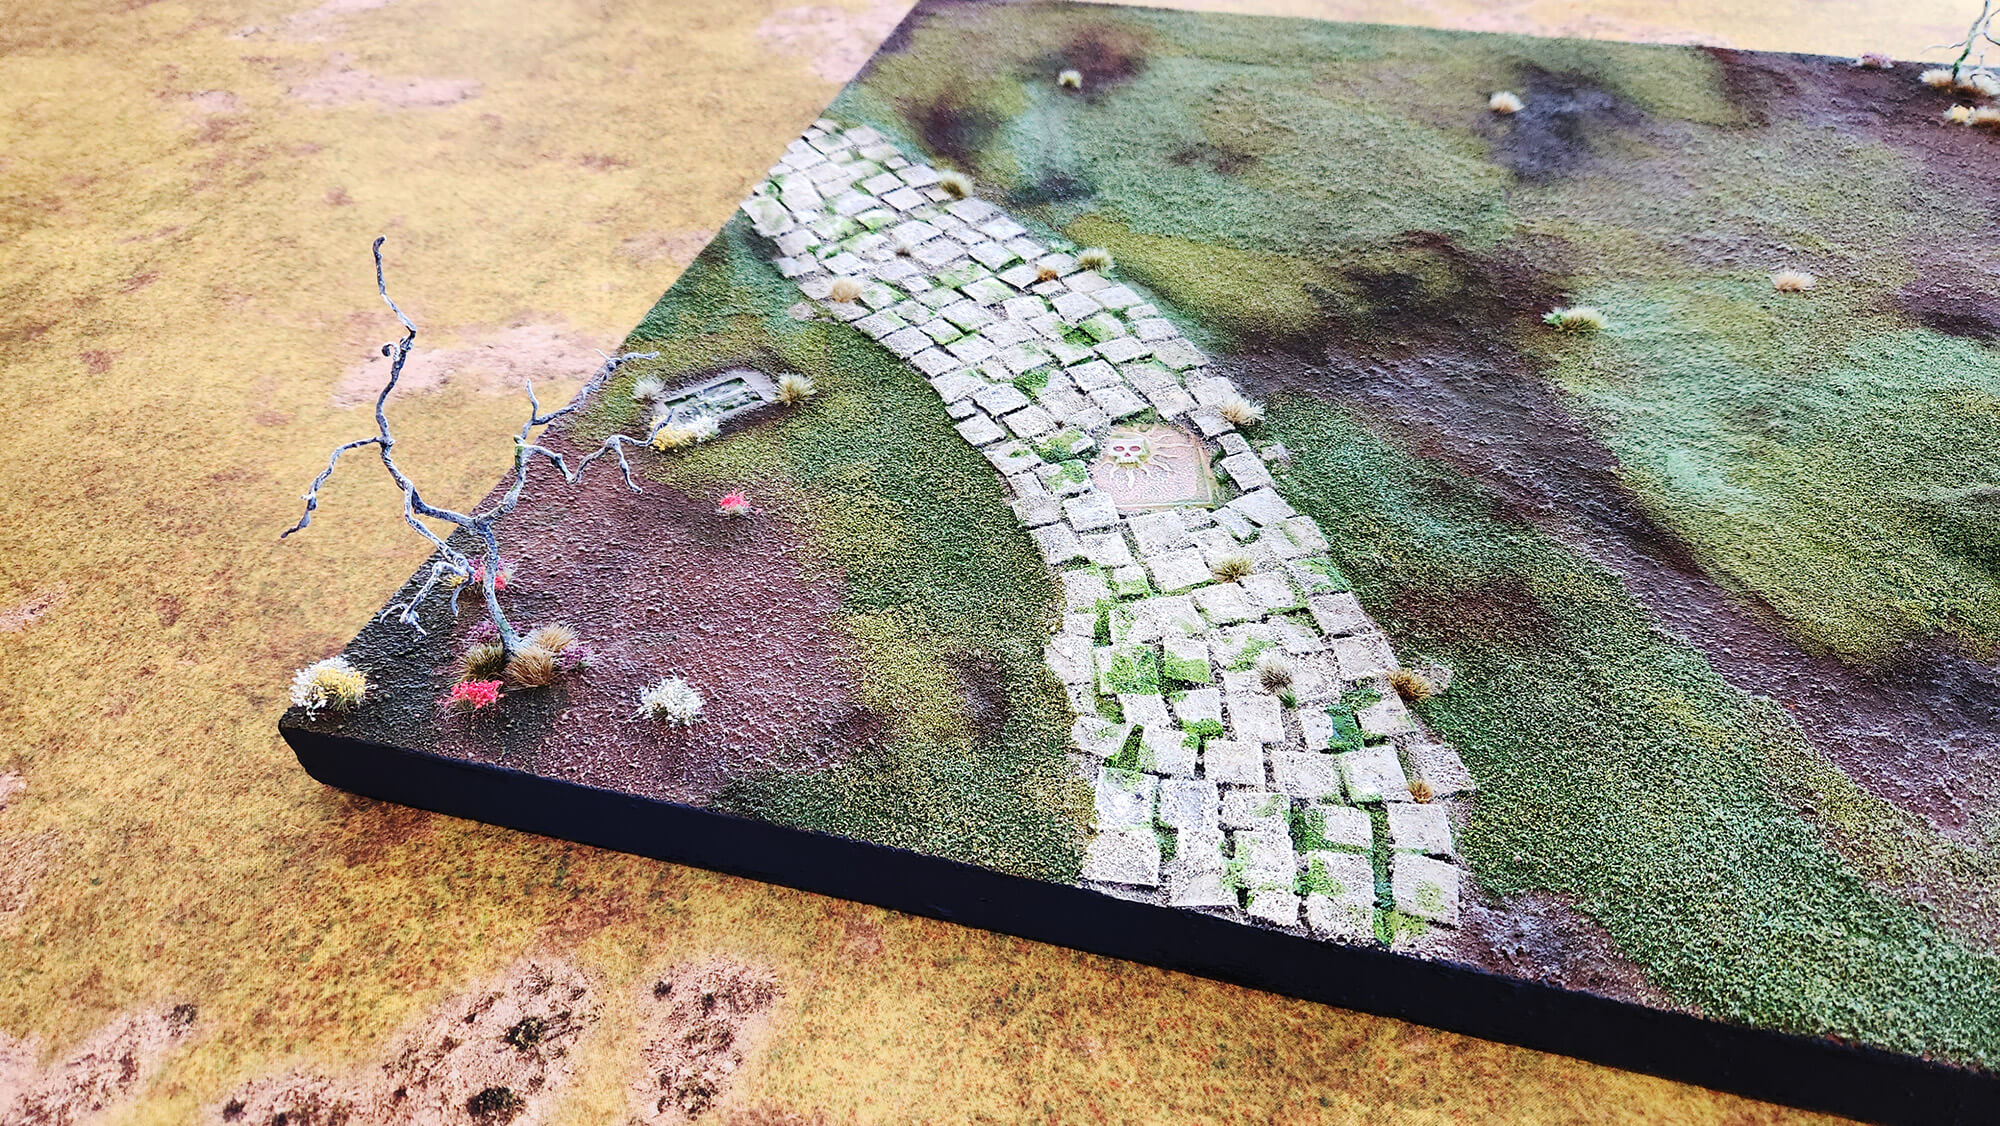
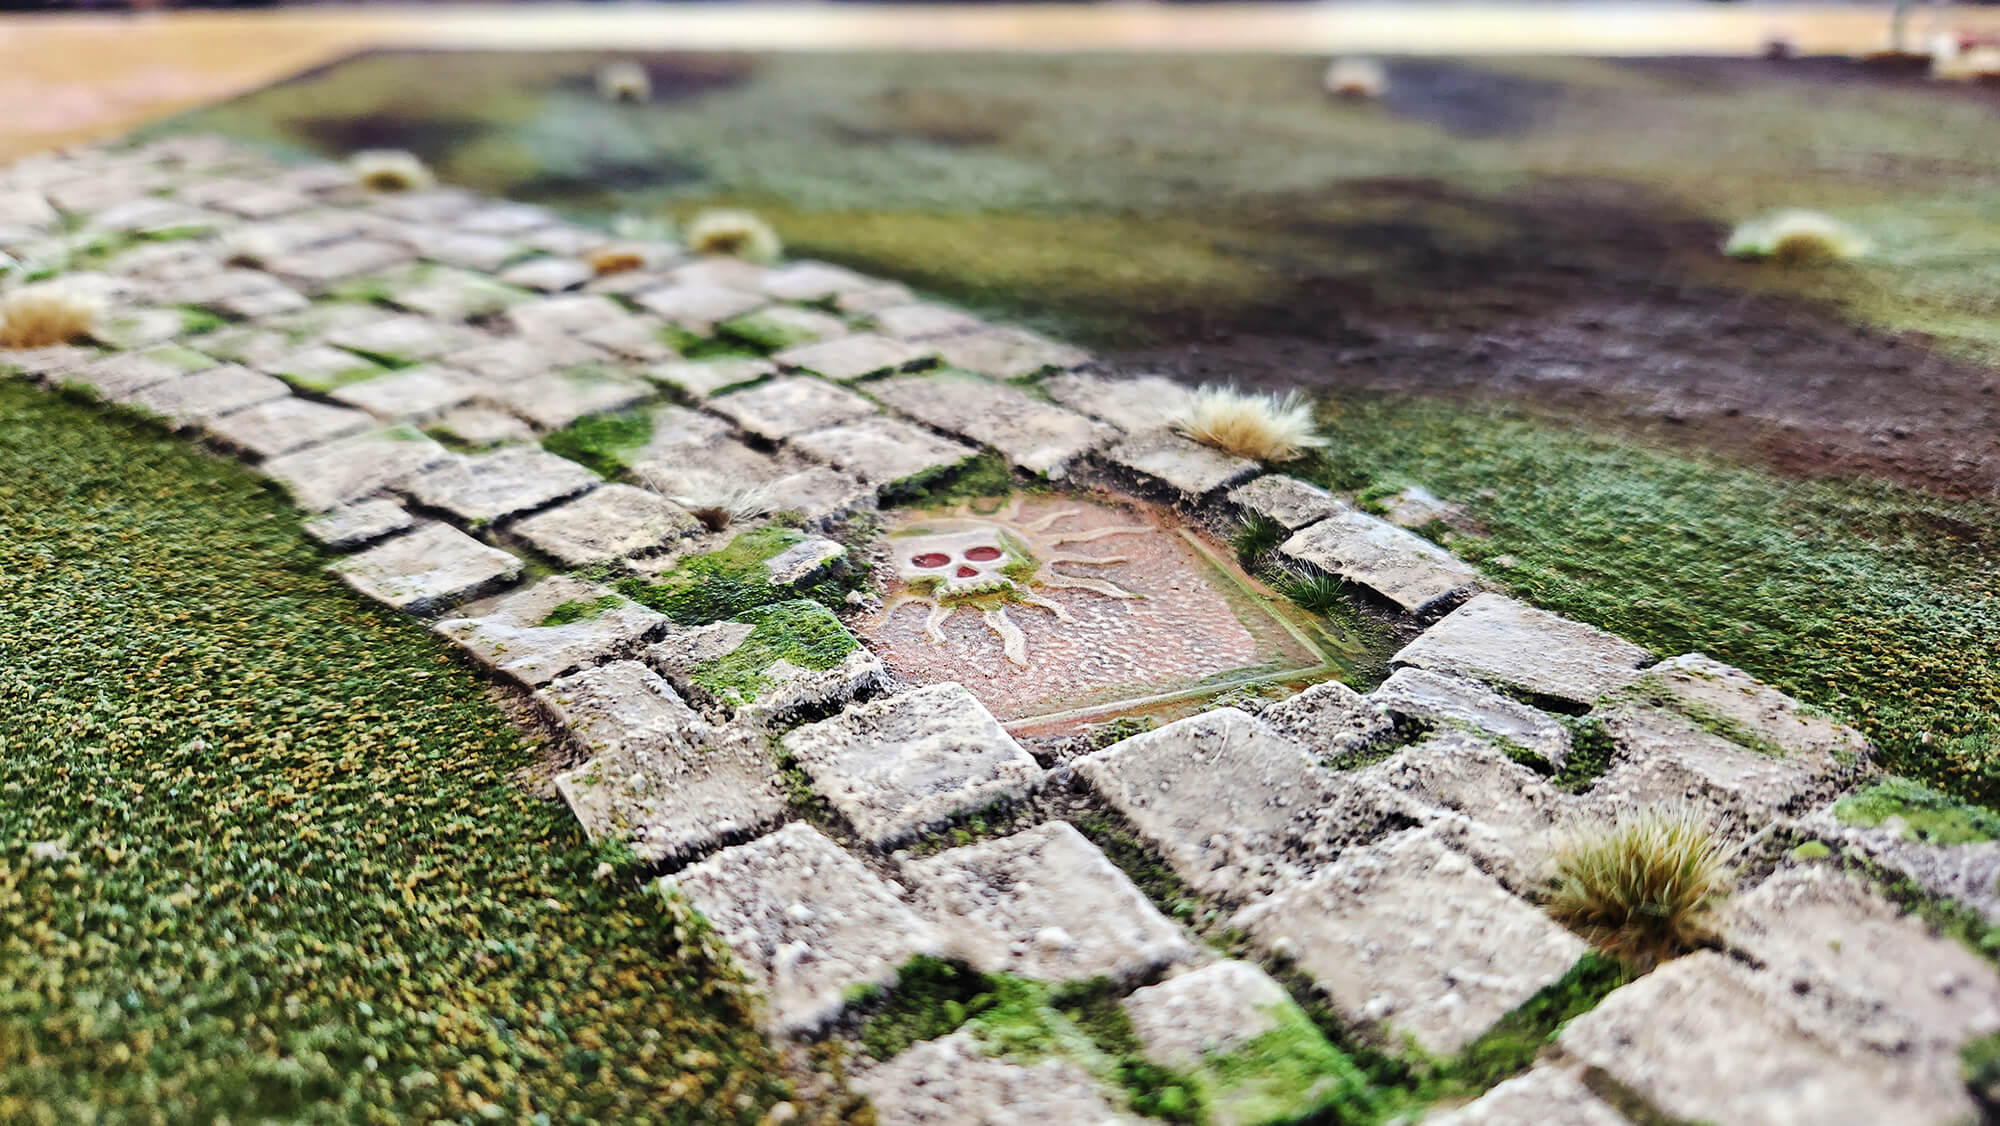
For the main feature of the path, I wanted to place a more decorative piece recessed into it. I wanted the piece to look like it has been there for a very long time and had a path built around it—perhaps having originally served as an indicator of the area from a bygone time. After finding a piece I liked from a Warhammer: Age of Sigmar Shattered Dominion Large Base Detail Kit, I cut a recess for it in the path with the utility knife. PVA glue secured it in place.
The Stonework
I used some scrap XPS foam to create the stone tiles for the path. Variety in the shape, size, and thickness of these tiles helps tell the story of a worn, ramshackle path built over time. I cut away some corners from the tiles to show some heavier wear and tear from foot traffic and time.
I brushed some PVA glue across the path area and glued the stone tile pieces in an irregular pattern. After the glue dried, I made a ball out of the aluminum foil and pressed/rolled it on the stone tiles to give the surfaces some texture.
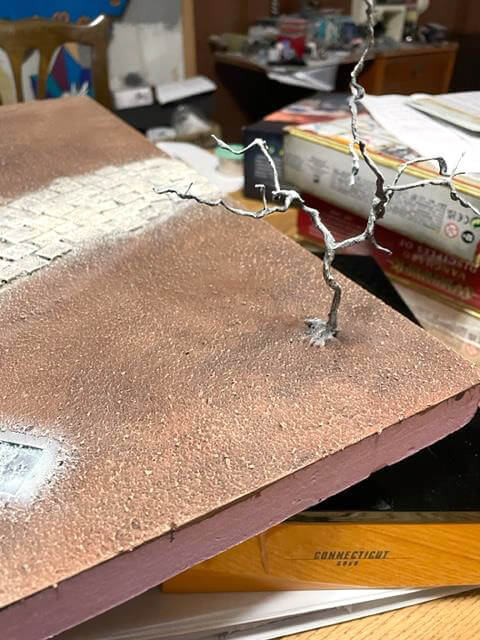
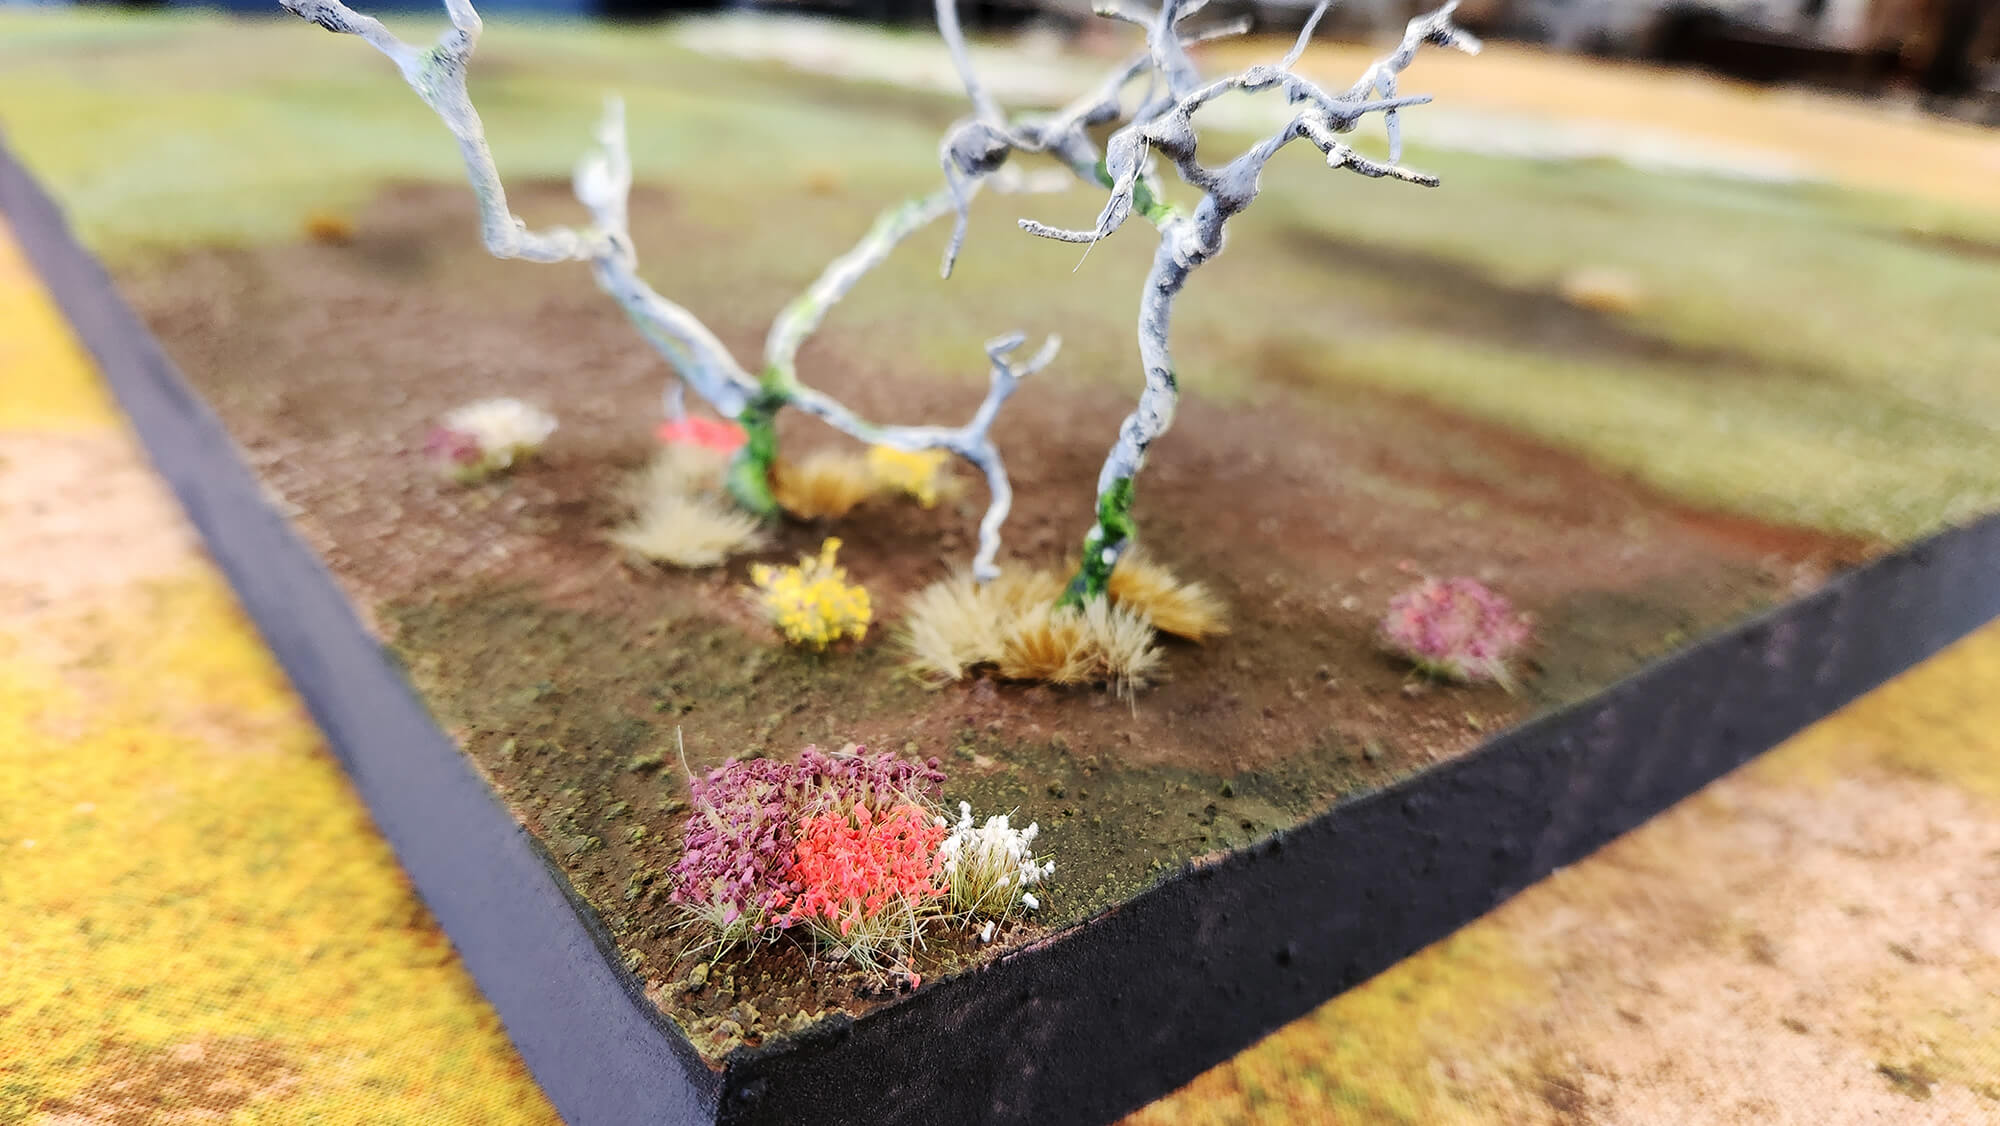
Trees
I custom made the trees for this terrain build. There are, of course, quality manufacturers of miniature trees that could be used, but I wanted to take this opportunity to really make this terrain build one-of-a-kind for Adepticon.
If you’d like to see a tutorial on this process, throw us a line about it on our social media channels!
![]()
![]()
![]()
…or flood the inbox of our Digital Media Specialist, Devin, with requests at [ —- REDACTED BY DEVIN —- ].

I added some texture to the tree framework with a mixture of super glue and baking soda, and then glued them in place with carpenter’s glue.
Main Board Texturing/Painting
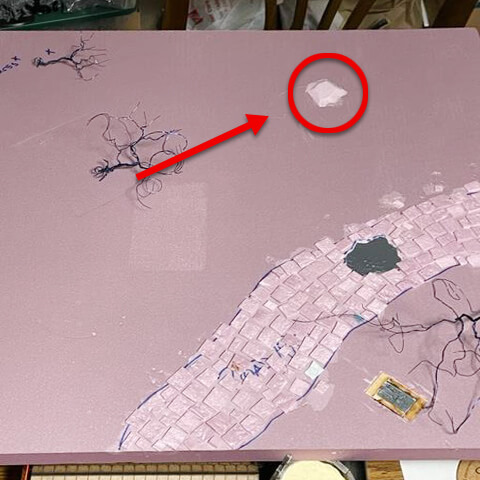
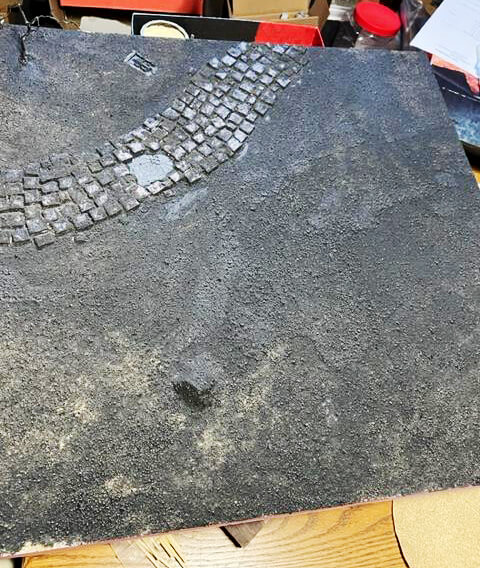
While I had the scrap XPS foam handy, I cut a small piece with which to create a mound, beveling the edges to make it more seamless. Some PVA glue attached it in an area where there was previously just empty space.
Now that the physical features of the board were all in place, it was time to bring it to life!
Sand
First, I wanted to add the fine sand for texture. I brushed the full board—except the grave and trees—with PVA glue, and then wiped some away from the stone tiles with a damp rag so the sand would be more patchy on top of them. Next I sprinkled the fine sand over everything and left it dry for a day. After it fully dried, I shook off the excess sand and used an old paintbrush to brush away any that remained. As hoped, the sand stuck to some path stones, but not all-over.
Next I coated the entire terrain build—trees, grave, and all—in a mix of PVA glue, cheap black craft paint, and a drop of liquid dish soap.
- The PVA serves to hold the sand in place, ensuring that you don’t start to see pink foam from sand falling away
- The dish soap improves the flow of the mixture, making sure the nooks and crannies get filled
- The black paint serves as an indicator of where you have already applied the mixture, and as shading for the paints that will go on top of it
Base Paints, Wash, & Drybrushing
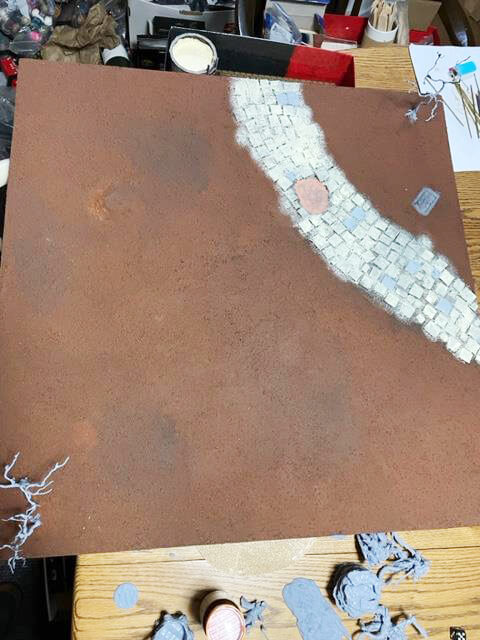
I applied a mid-tone brown paint to the majority of the board. While it was still wet, I watered down some burnt umber paint and applied splotches of it in certain spots to break up the monotony of the mid-tone brown.
Next I painted the path with ivory paint. The trees, the grave, and some of the stone tiles got light grey paint. And I painted the decorative, recessed piece with tangerine paint.
Note: All of these paints are cheap, craft store paints (ex: Apple Barrel, or Craftsmart). No reason to use the good paints on such large areas!
I made a wash using black ink, peat ink, matte medium, water, and a drop of dish soap and coated the trees, path, and grave with it. Once dry, I drybrushed the entire board, first with tan paint, and then with a cream-colored paint.
Vegetation
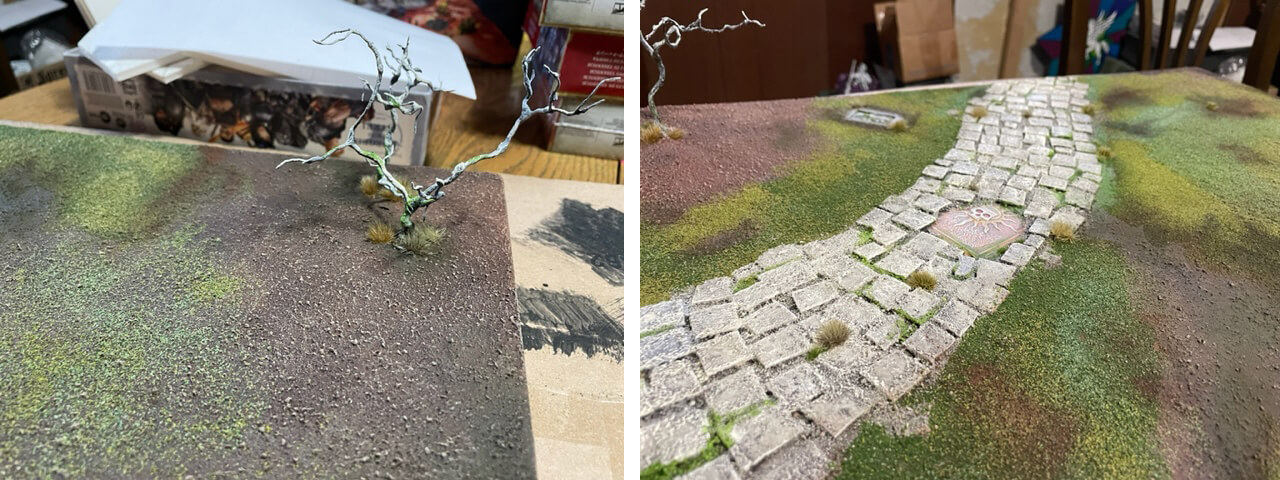
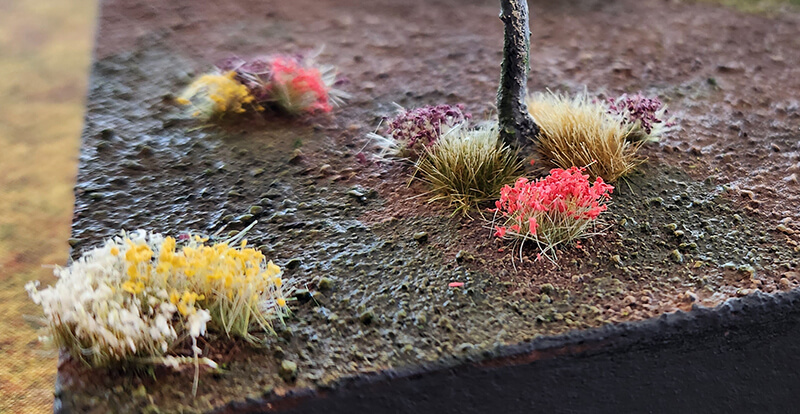
I used Dirty Down Moss by Goblin’s Hut on the lower part of the tree trunks and some branches. Some of that went onto some of the path tiles and grave. This was done to places where it seemed likely that moss would grow naturally and also feathered out and applied lightly to spots around those areas.
Some watered-down PVA glue adhered Woodland Scenics‘ Green Grass flock to some areas. Putting more of the watered-down PVA on and around that flock, I added more Green Grass flock—this time from The Army Painter. I sprinkled some very finely over the muddy spots as if grass were poking through it. This broke up the vibrant green grass, making it look more realistic and less like an illustration.
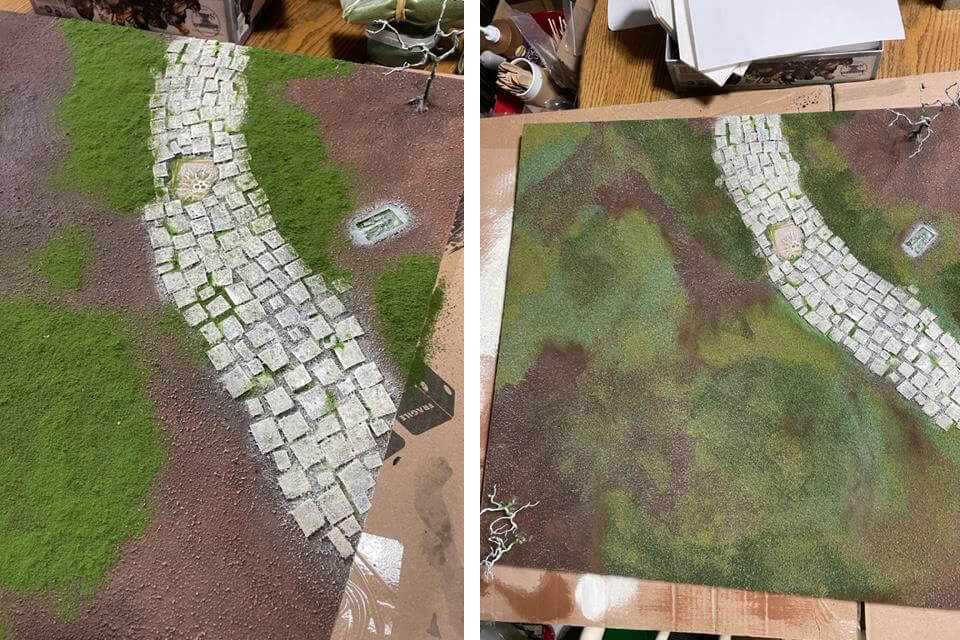
I added various hues of pigment powders from Huge Miniatures to make the ground look more natural. This was great for achieving a “pure dirt,” look. I also added tufts of various colorations from The Army Painter, Huge Miniatures, and some from a local creator.
Finishing up
I mixed black paint, PVA glue, and white flour in equal parts and painted the sides with the mixture. This put a nice frame around the piece. It also added a little protection from bumps and other rigors of play.
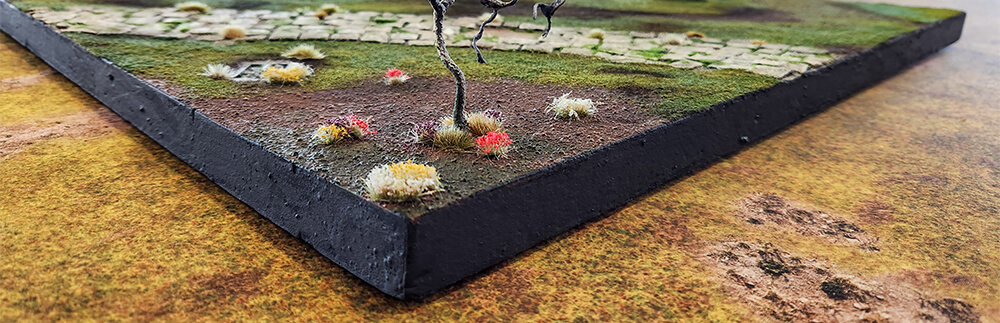
After showing the terrain build to the Kyngsvood organizer, he suggested a bit more life around the dead trees. I had some flower tufts from Green Stuff World that would add splashes of vibrant color and life to the board. A nice contrast to the otherwise dull corners!
The board is done and ready to host the unsavory hunts. It’s sturdy and would easily hold a few terrain pieces on top of it for more variation!


The construction of this terrain board and the build process were done by Steve “Stevil” Lemberg, one of our Miniatures Masters here at Noble Knight Games!
Also check out his step-by-step build: Tabletop Tavern on a Budget!