Tabletop Tavern on a Budget
Stevil—one of our Miniatures Masters—recently built gritty little tabletop tavern for his RPG group. He offered to show us how the magic happens.
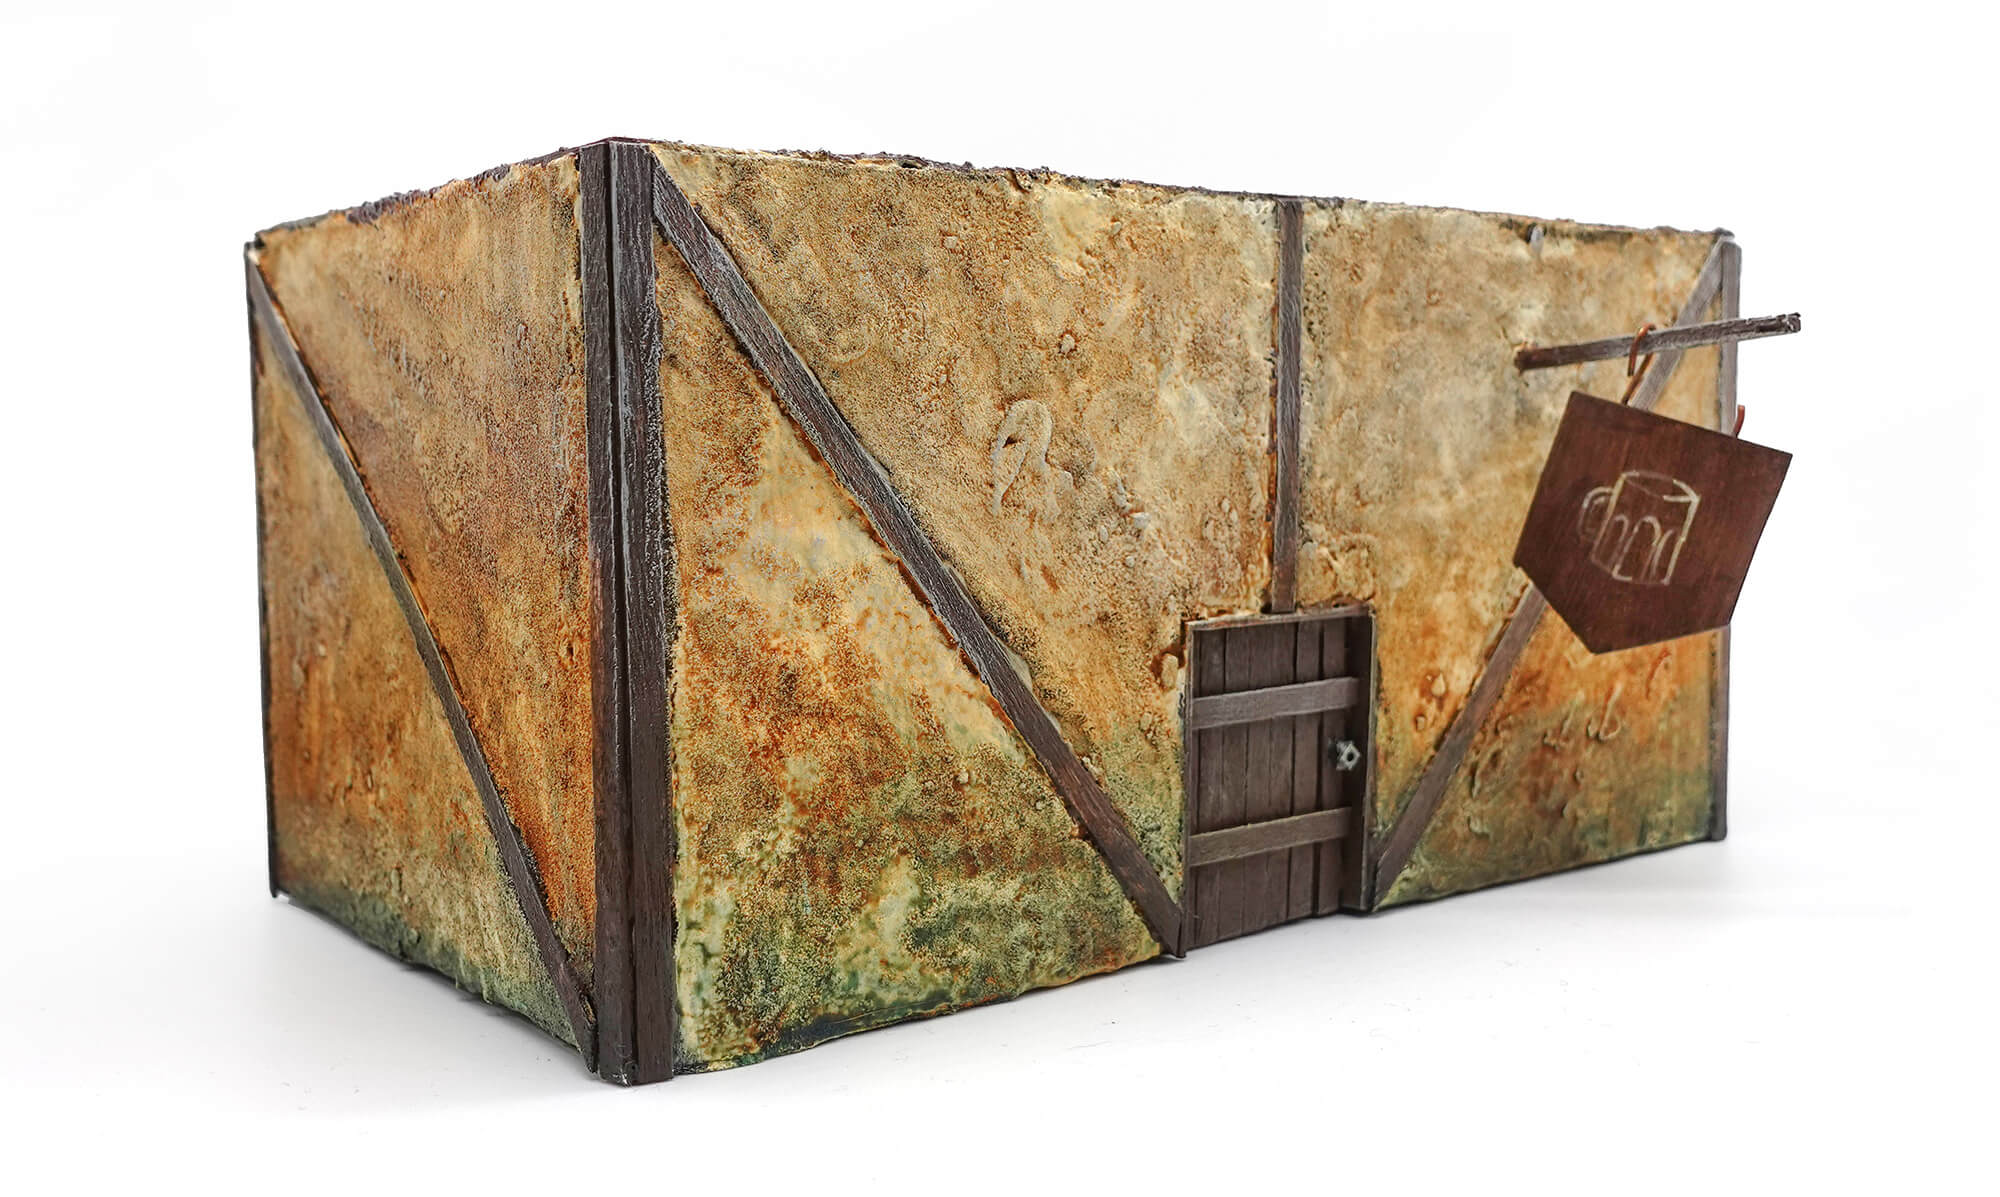
I wanted to make a couple of poorly kept and run-down buildings on the cheap for one of my current games—Ravenloft’s Falkovnia, for you curious types. Any crafter will tell you that the biggest element of “on the cheap” is what you already have lying around. In this case, I wanted to make a tabletop tavern.
I had a few empty, corrugated cardboard boxes. It was time to get to work!
Recommended Supplies
|
|
Prepping the Tavern Structure
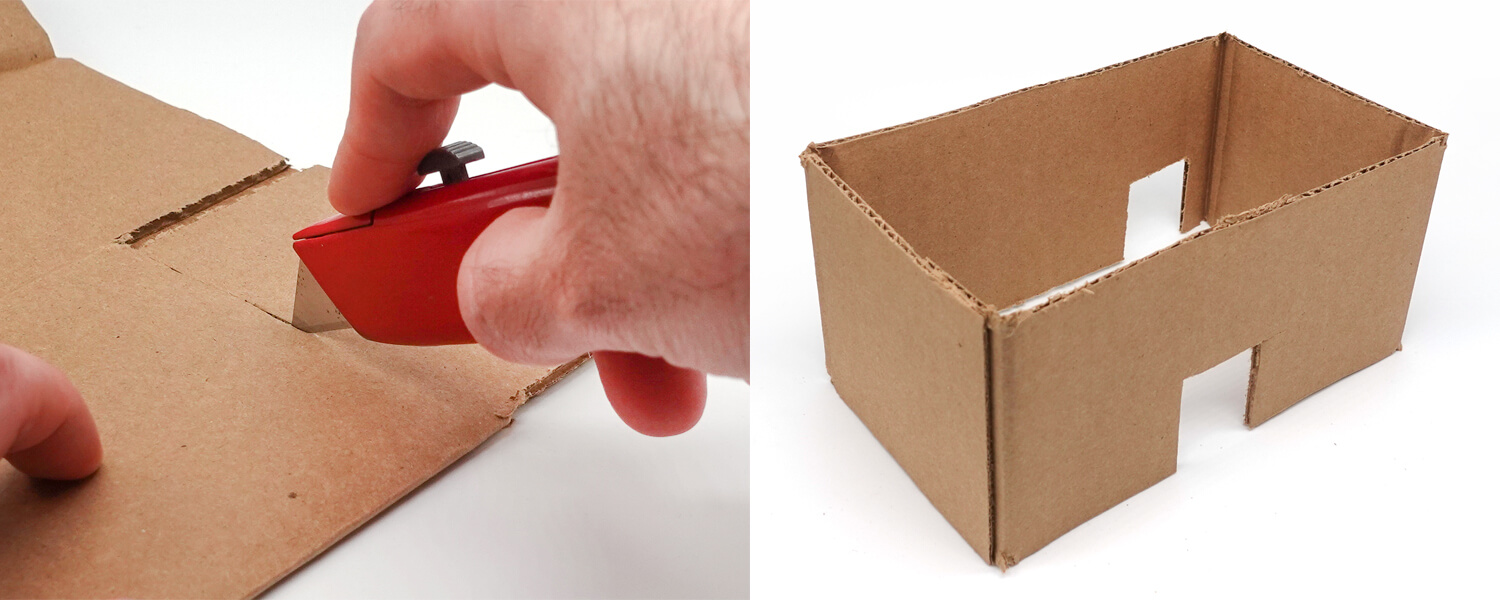
- Flatten box and remove any tape
- Cut flaps off with utility knife
- Cut front and rear doorways
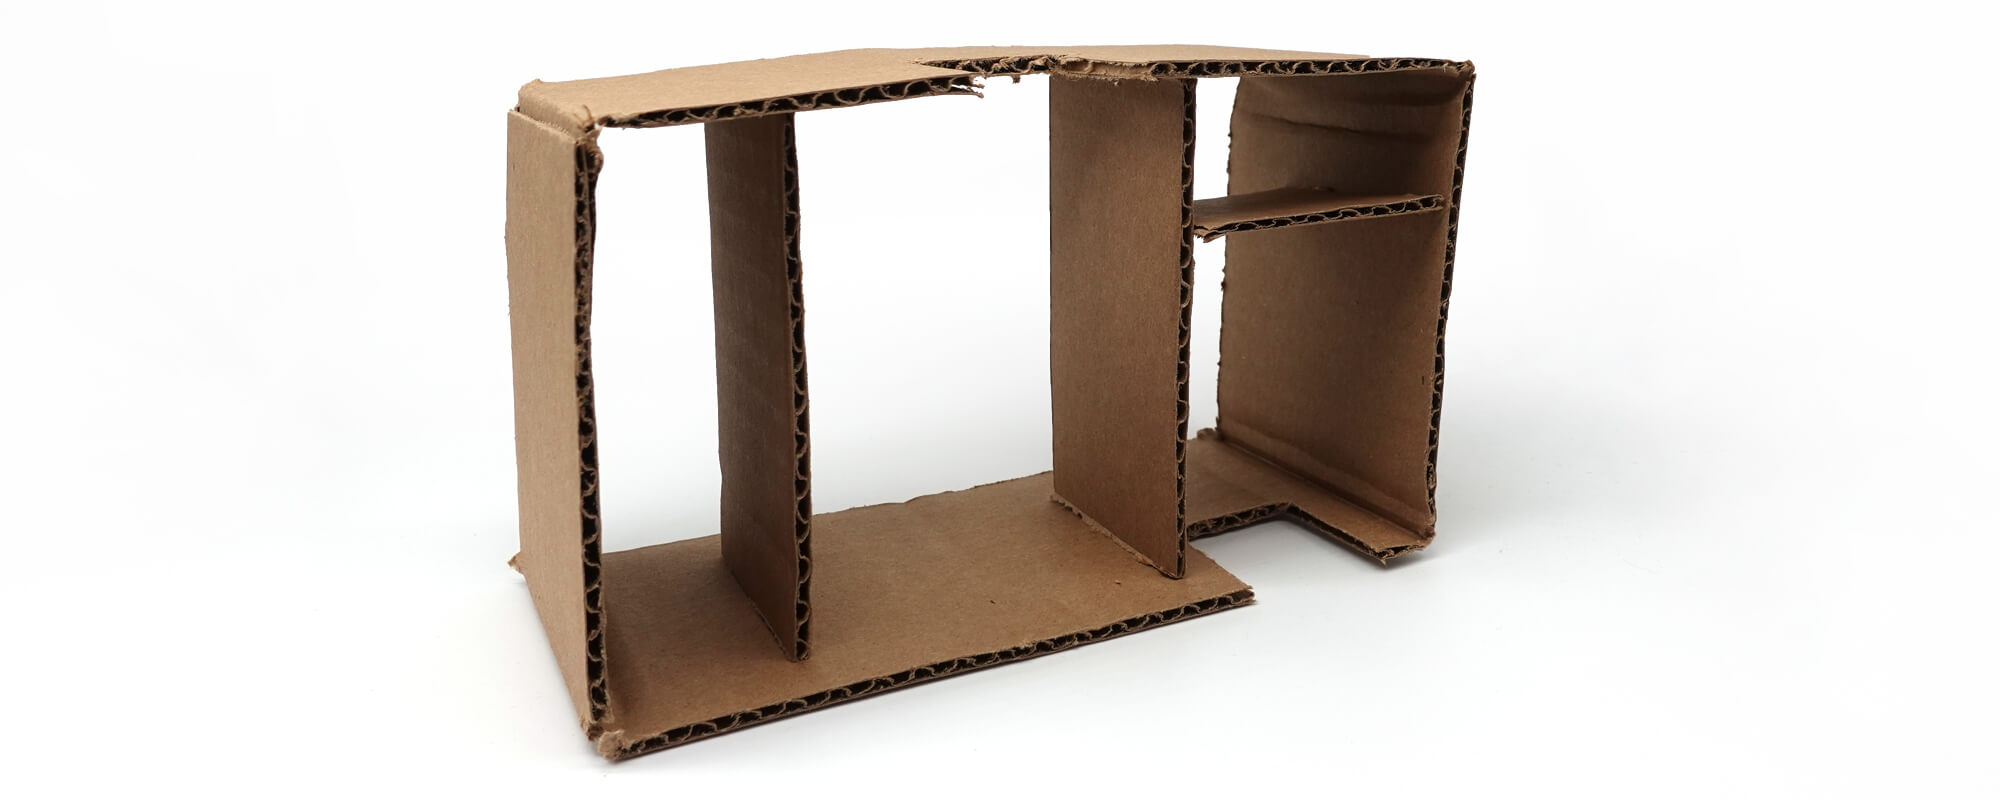
- With the hot glue gun, glue flaps inside to reinforce the structure
- Use hobby knife to poke/twist a tiny hole into the front of the tavern where the signpost will go
- Just big enough to snugly fit a matchstick
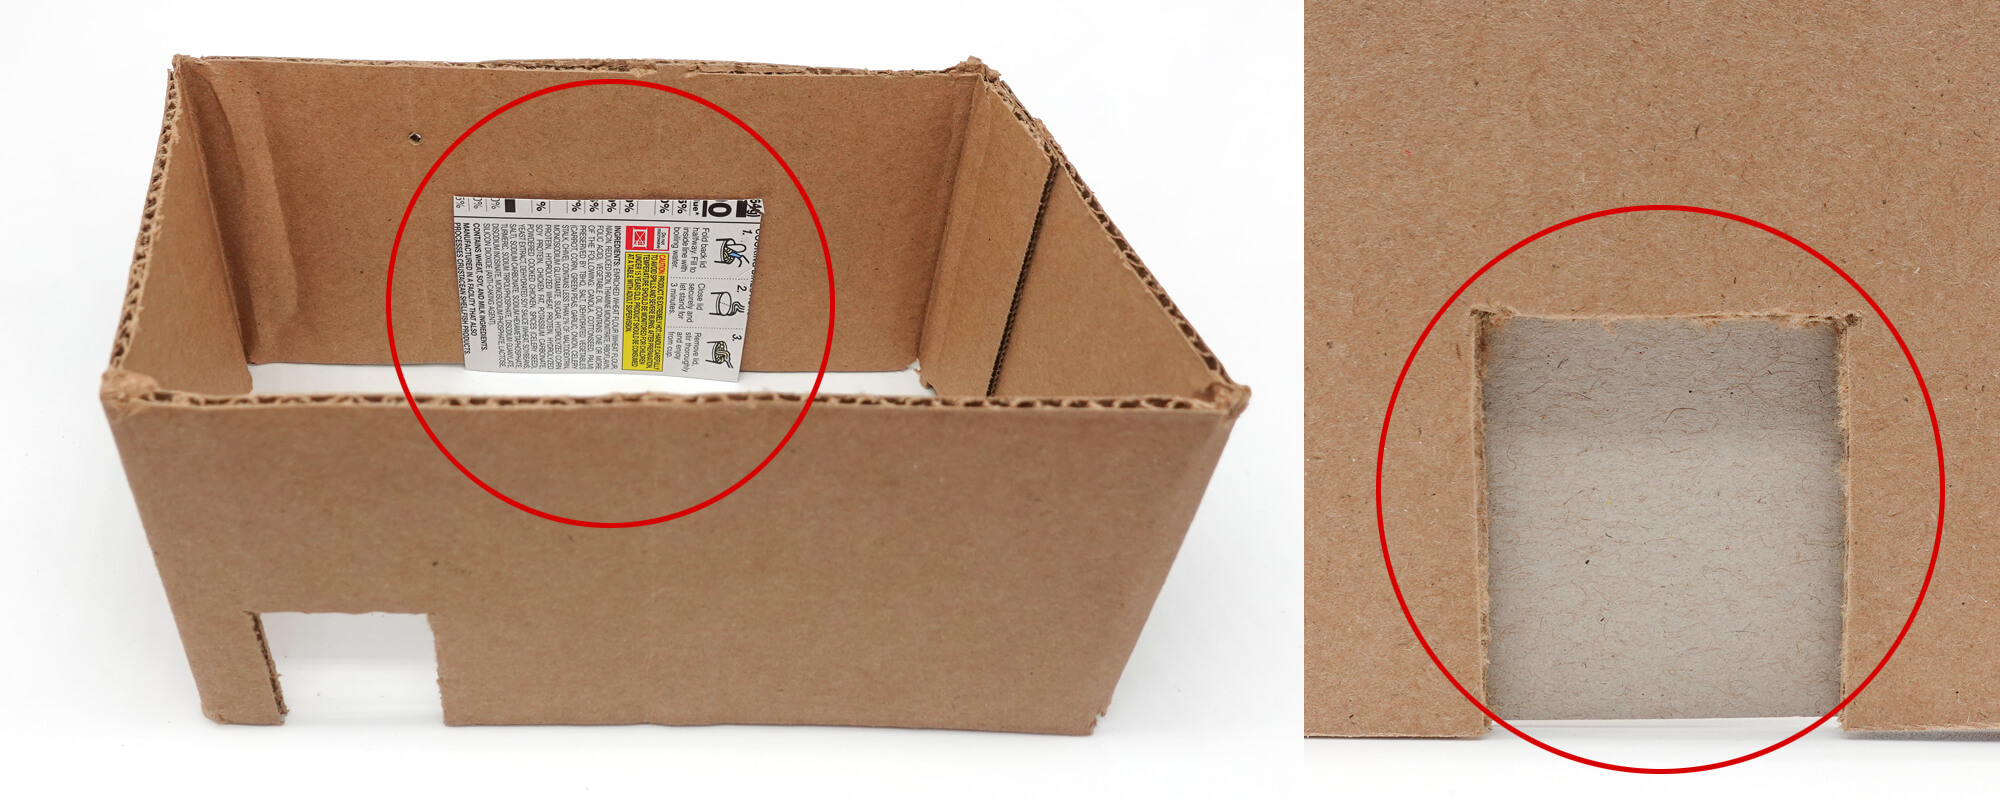
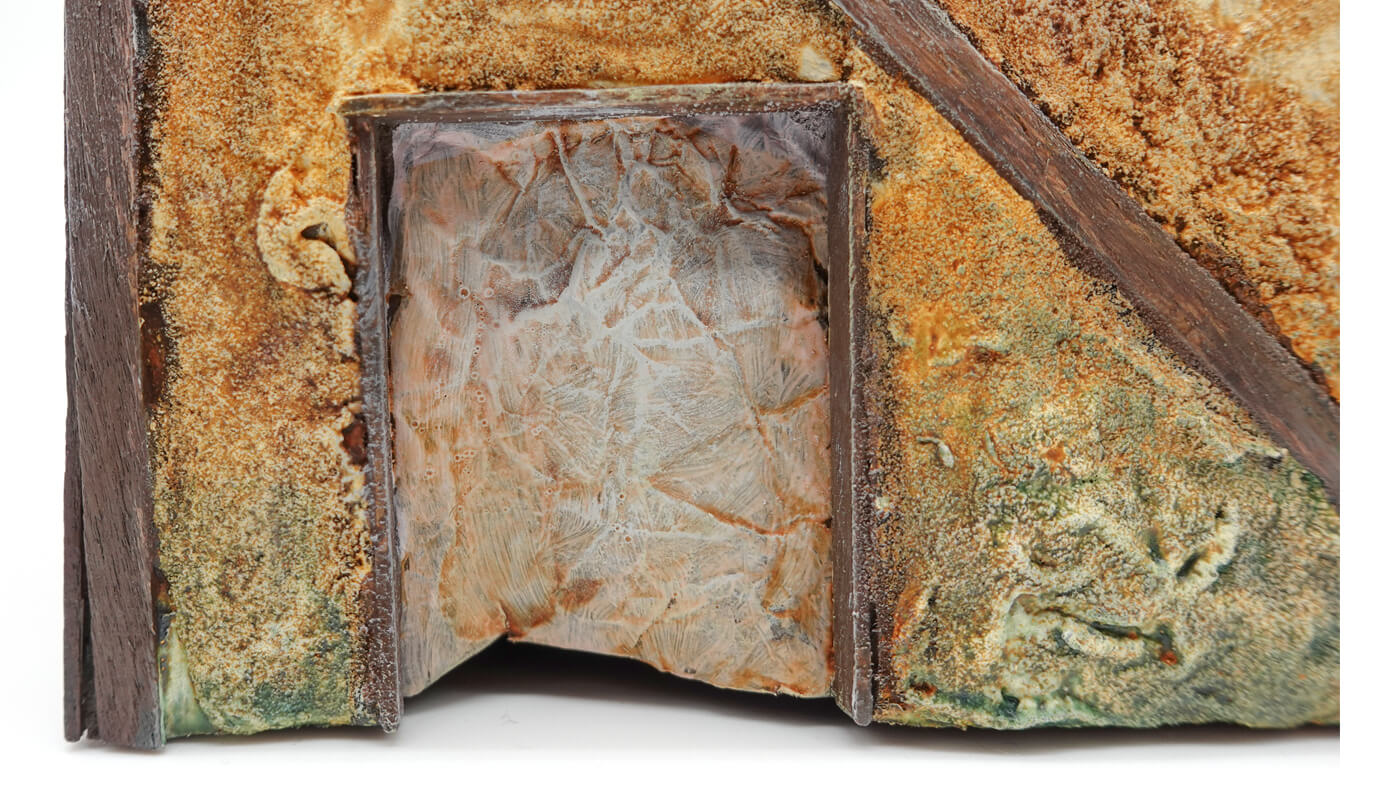
Door Frames
FRONT DOORWAY ONLY
- Cut a piece of cardstock (from the snack/cereal box) that is wider and taller than the front doorway
- Glue it to the inside of the tavern with tacky glue so it blocks the front doorway
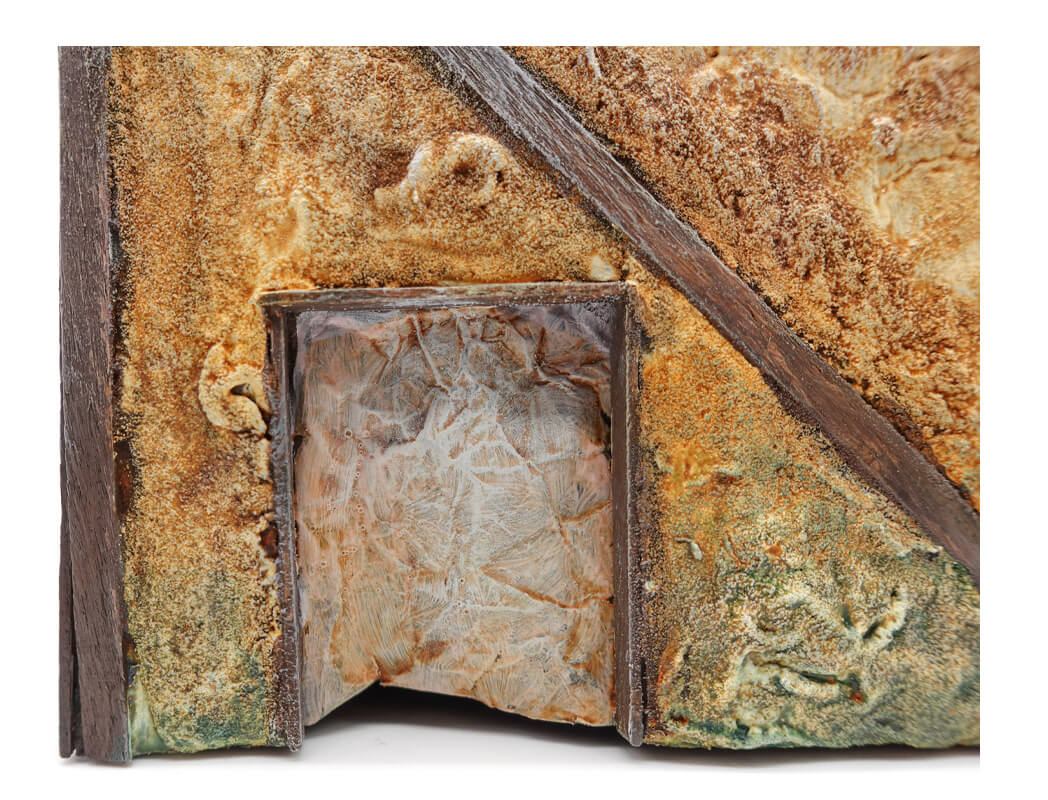
BOTH DOORWAYS
- For each doorway, measure and cut wooden coffee stirrers into three pieces; these will be the sides and top of the door frames
- Adhere the wooden pieces to the exposed cardboard corrugation with tacky glue; hot glue is too messy here, and the tacky glue will dry faster than PVA glue
-
-
- Use snips to cut away any wood that extends past the bottom of the tavern
-
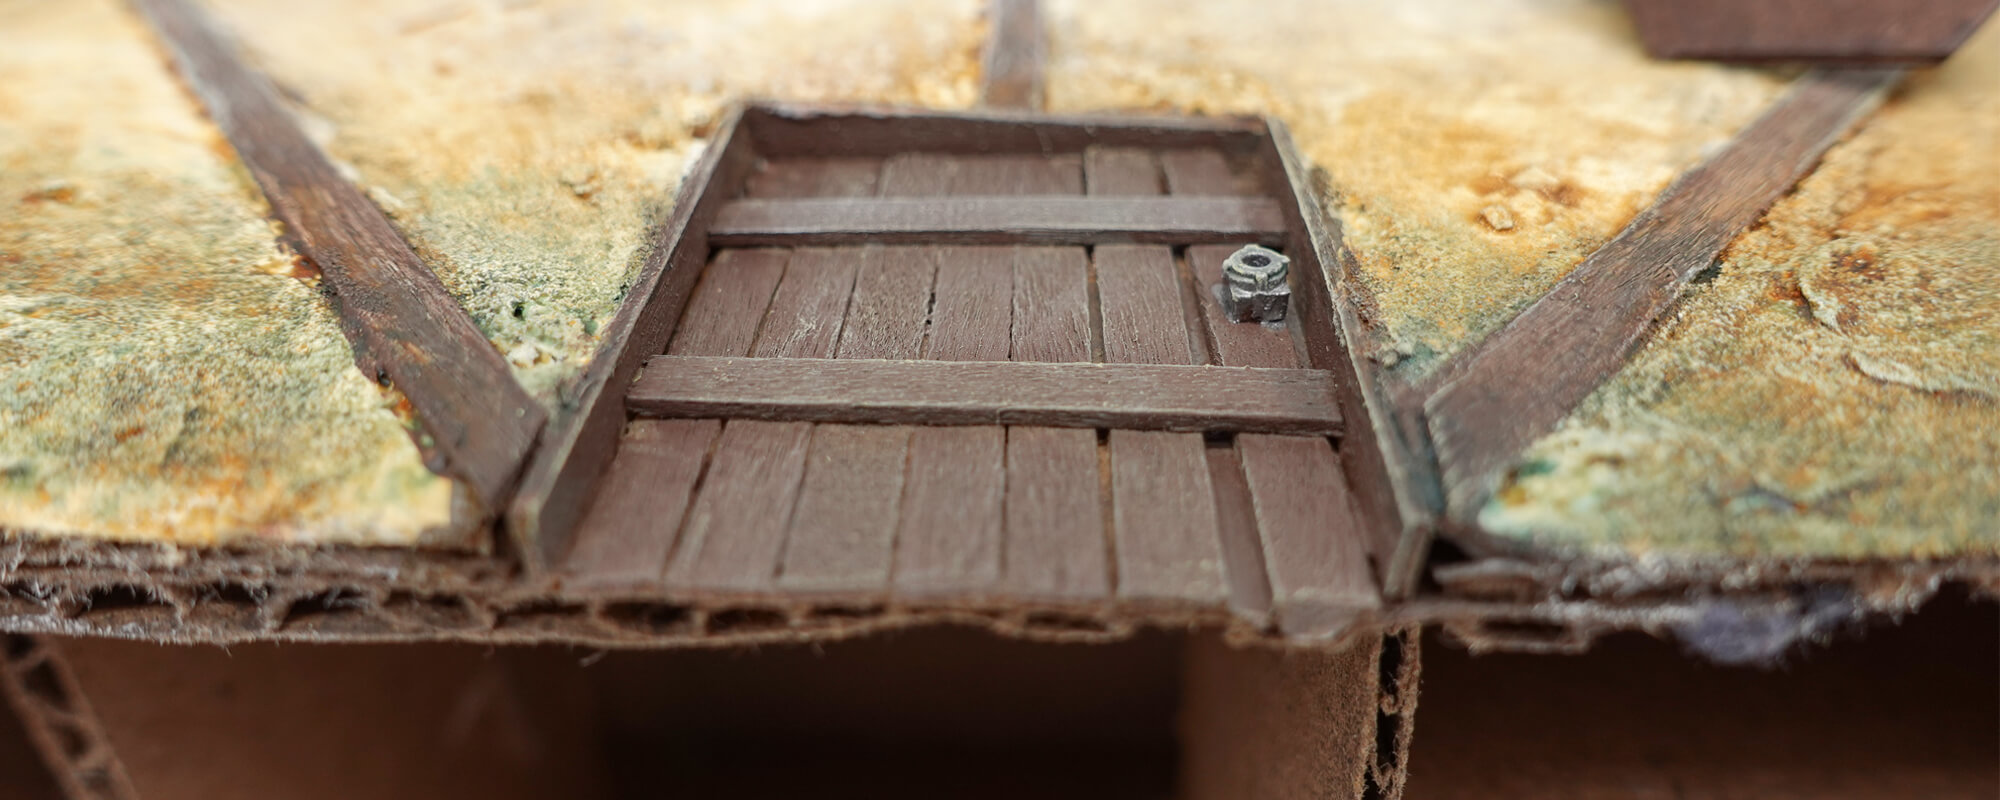
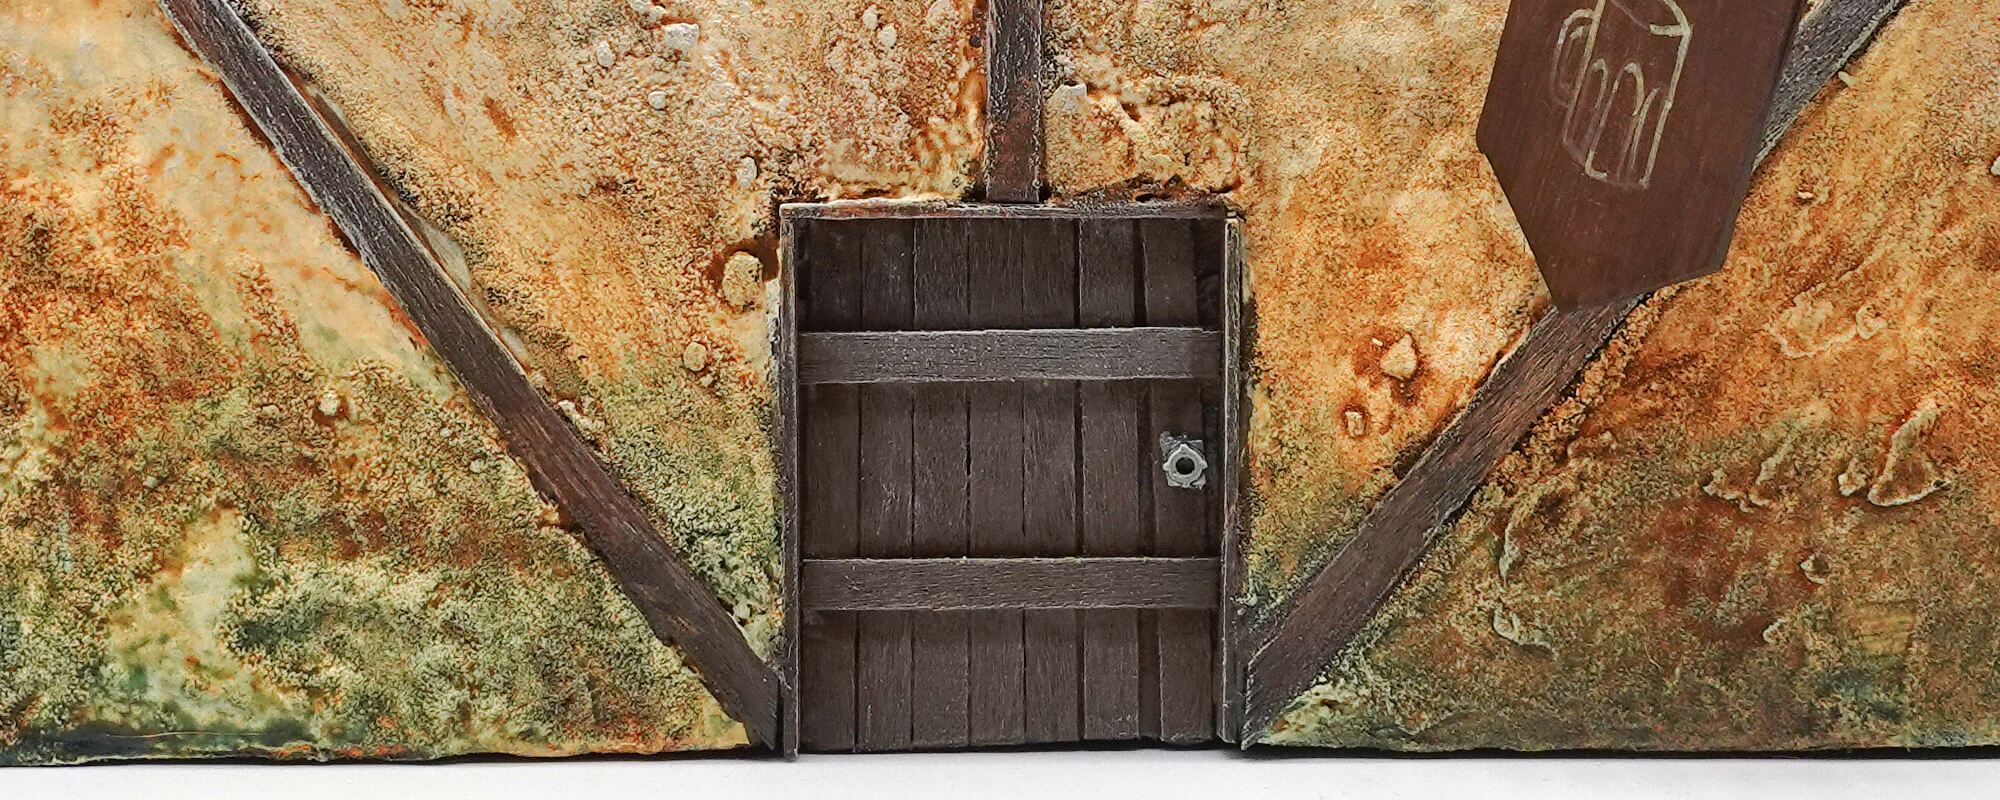
Front Door
- Cut more pieces from coffee stirrers that will become the slats of the door itself
- Cut them to the height of the doorway
- Once these slats are cut, smear tacky glue onto the outside of the cardstock
- Place the door slats onto the cardstock side-by-side until you can’t fit any more
-
-
- Our goal is a run-down, gritty look, so uneven gaps or crookedness of the slats can help
-
- Cut two more lengths of coffee stirrer the width of the doorway
- Use dots of Zap-A-Gap to glue them horizontally on to the door slats
- Use a little piece of mini that you have lying around as a doorknob and adhere it with a tiny dot of Zap-A-Gap
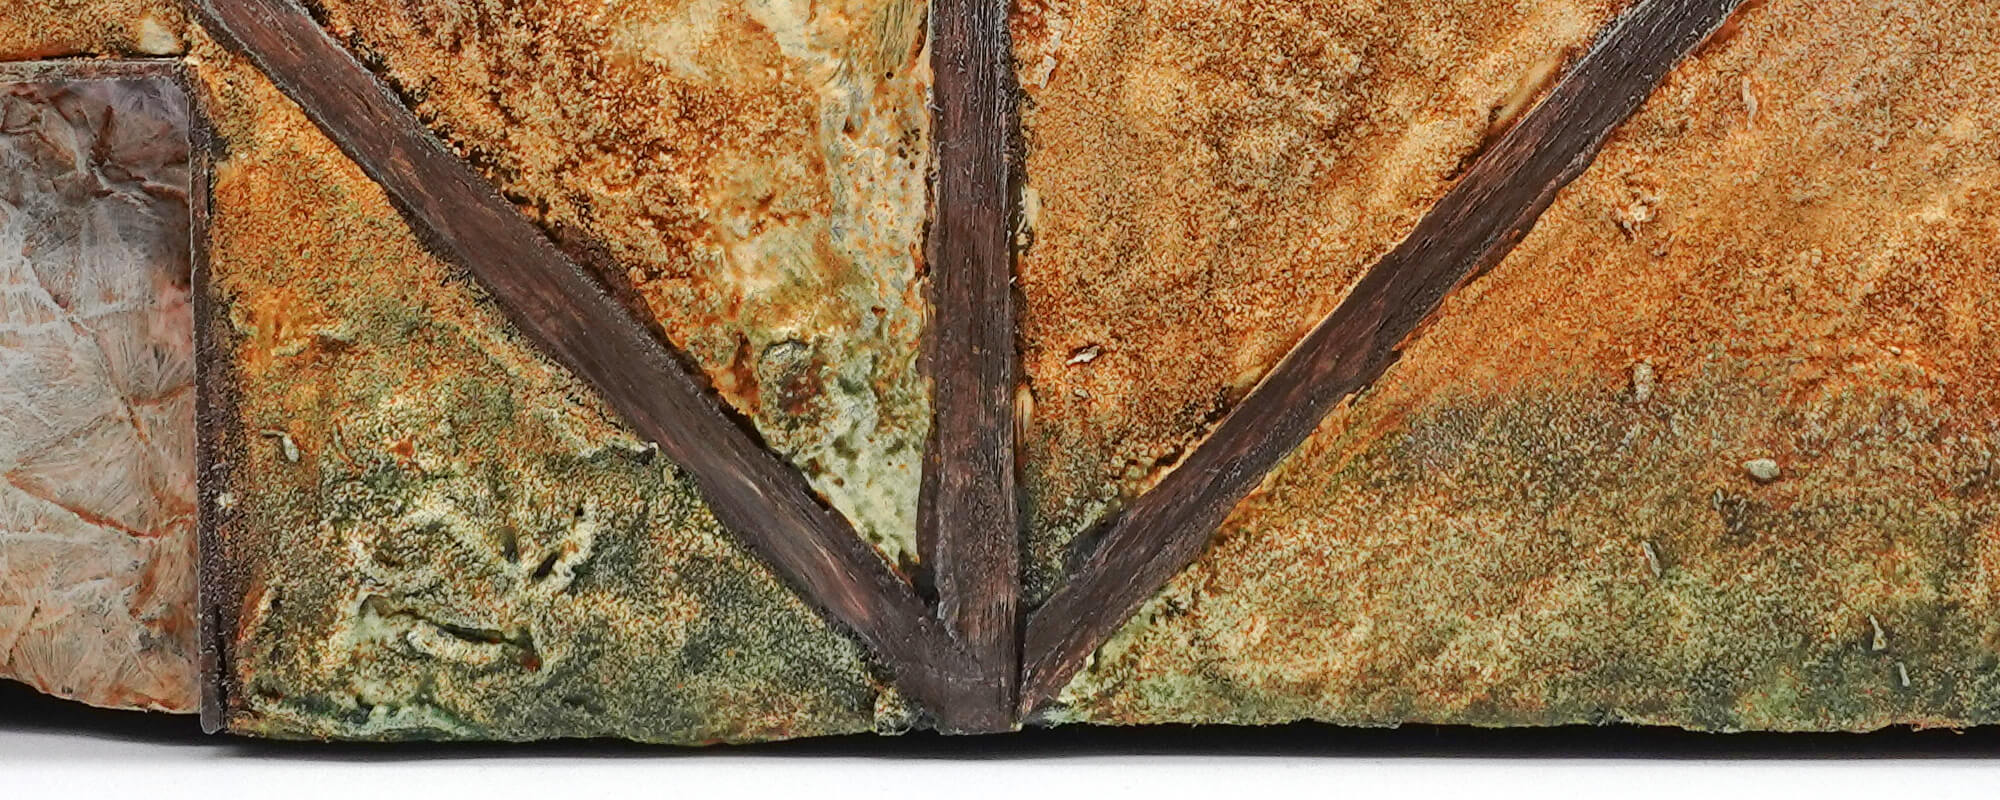
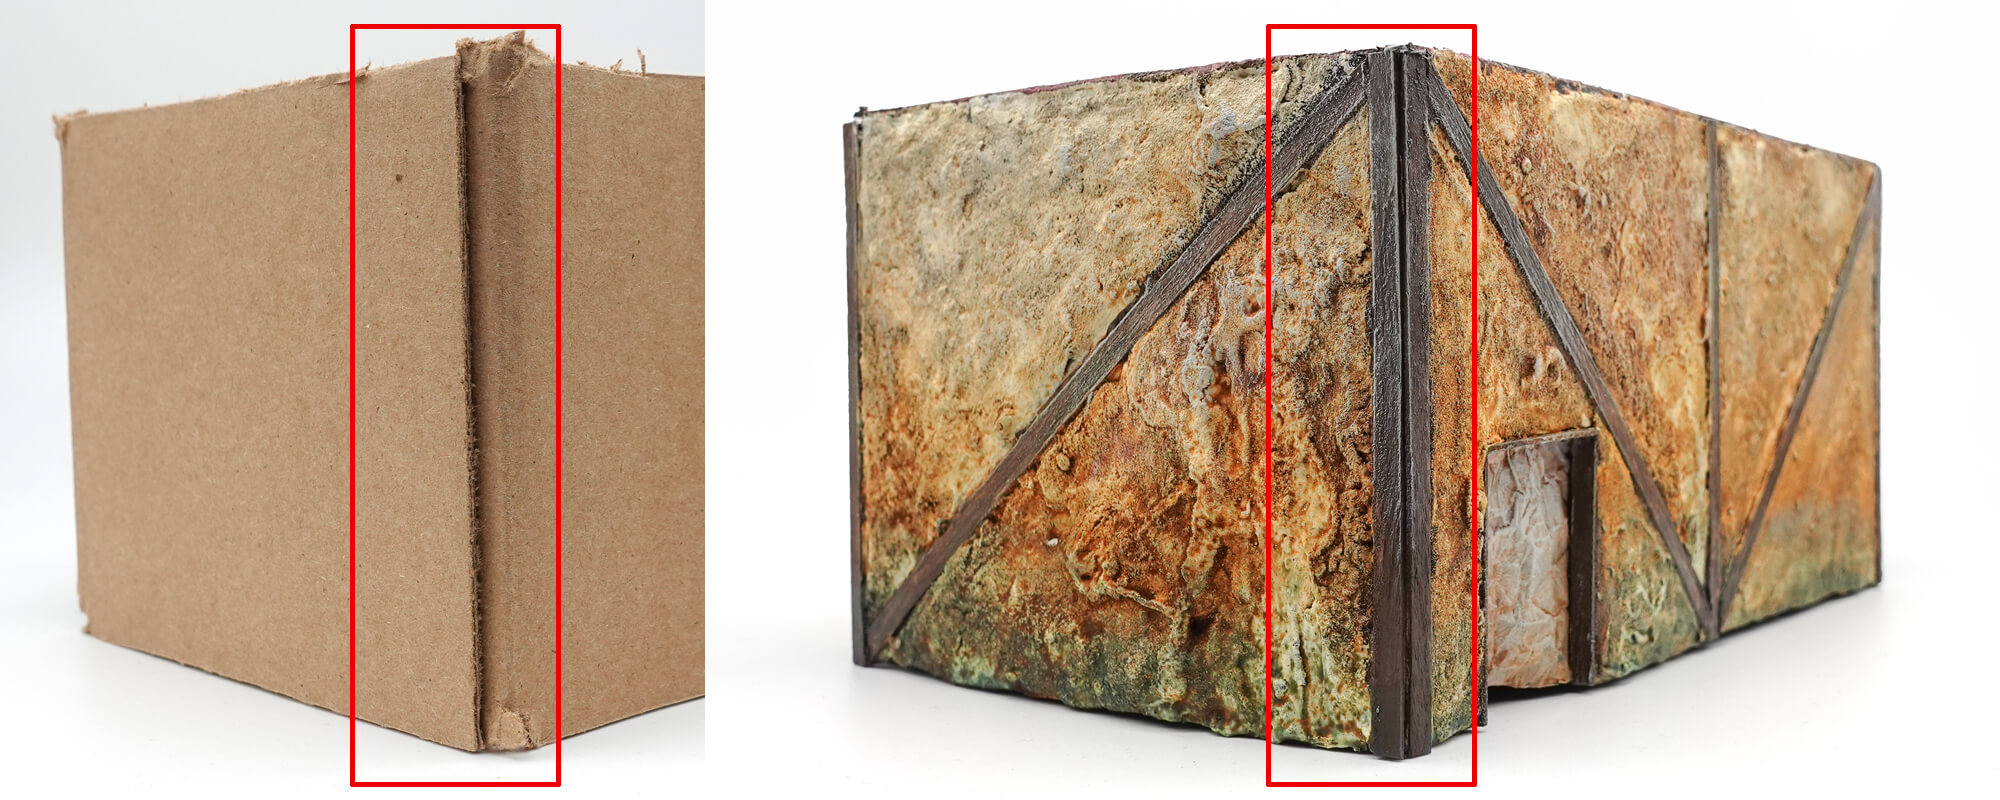
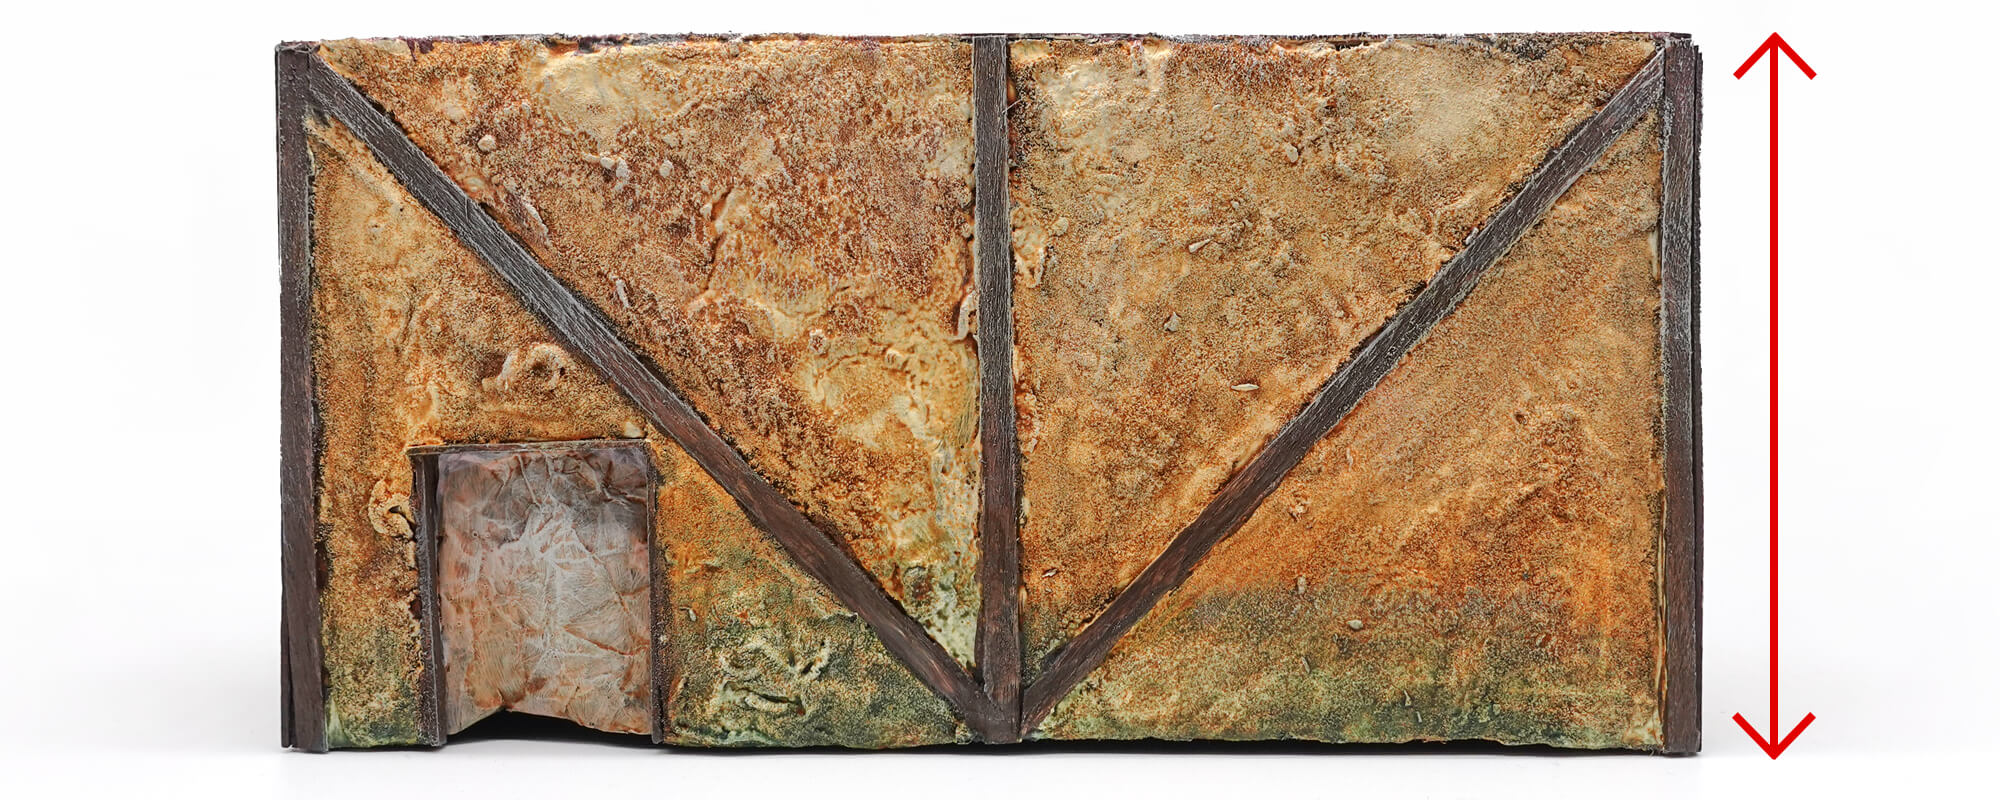
Exterior Bracing
- Trim and adhere coffee stirrers with tacky glue to the flat faces on the outside of the building to create more visual interest
- Can be clamped until dry if necessary
Signpost, Back Doorway, and Roof
- Insert the matchstick into the signpost hole and—on the inside of the structure—hot glue it in place
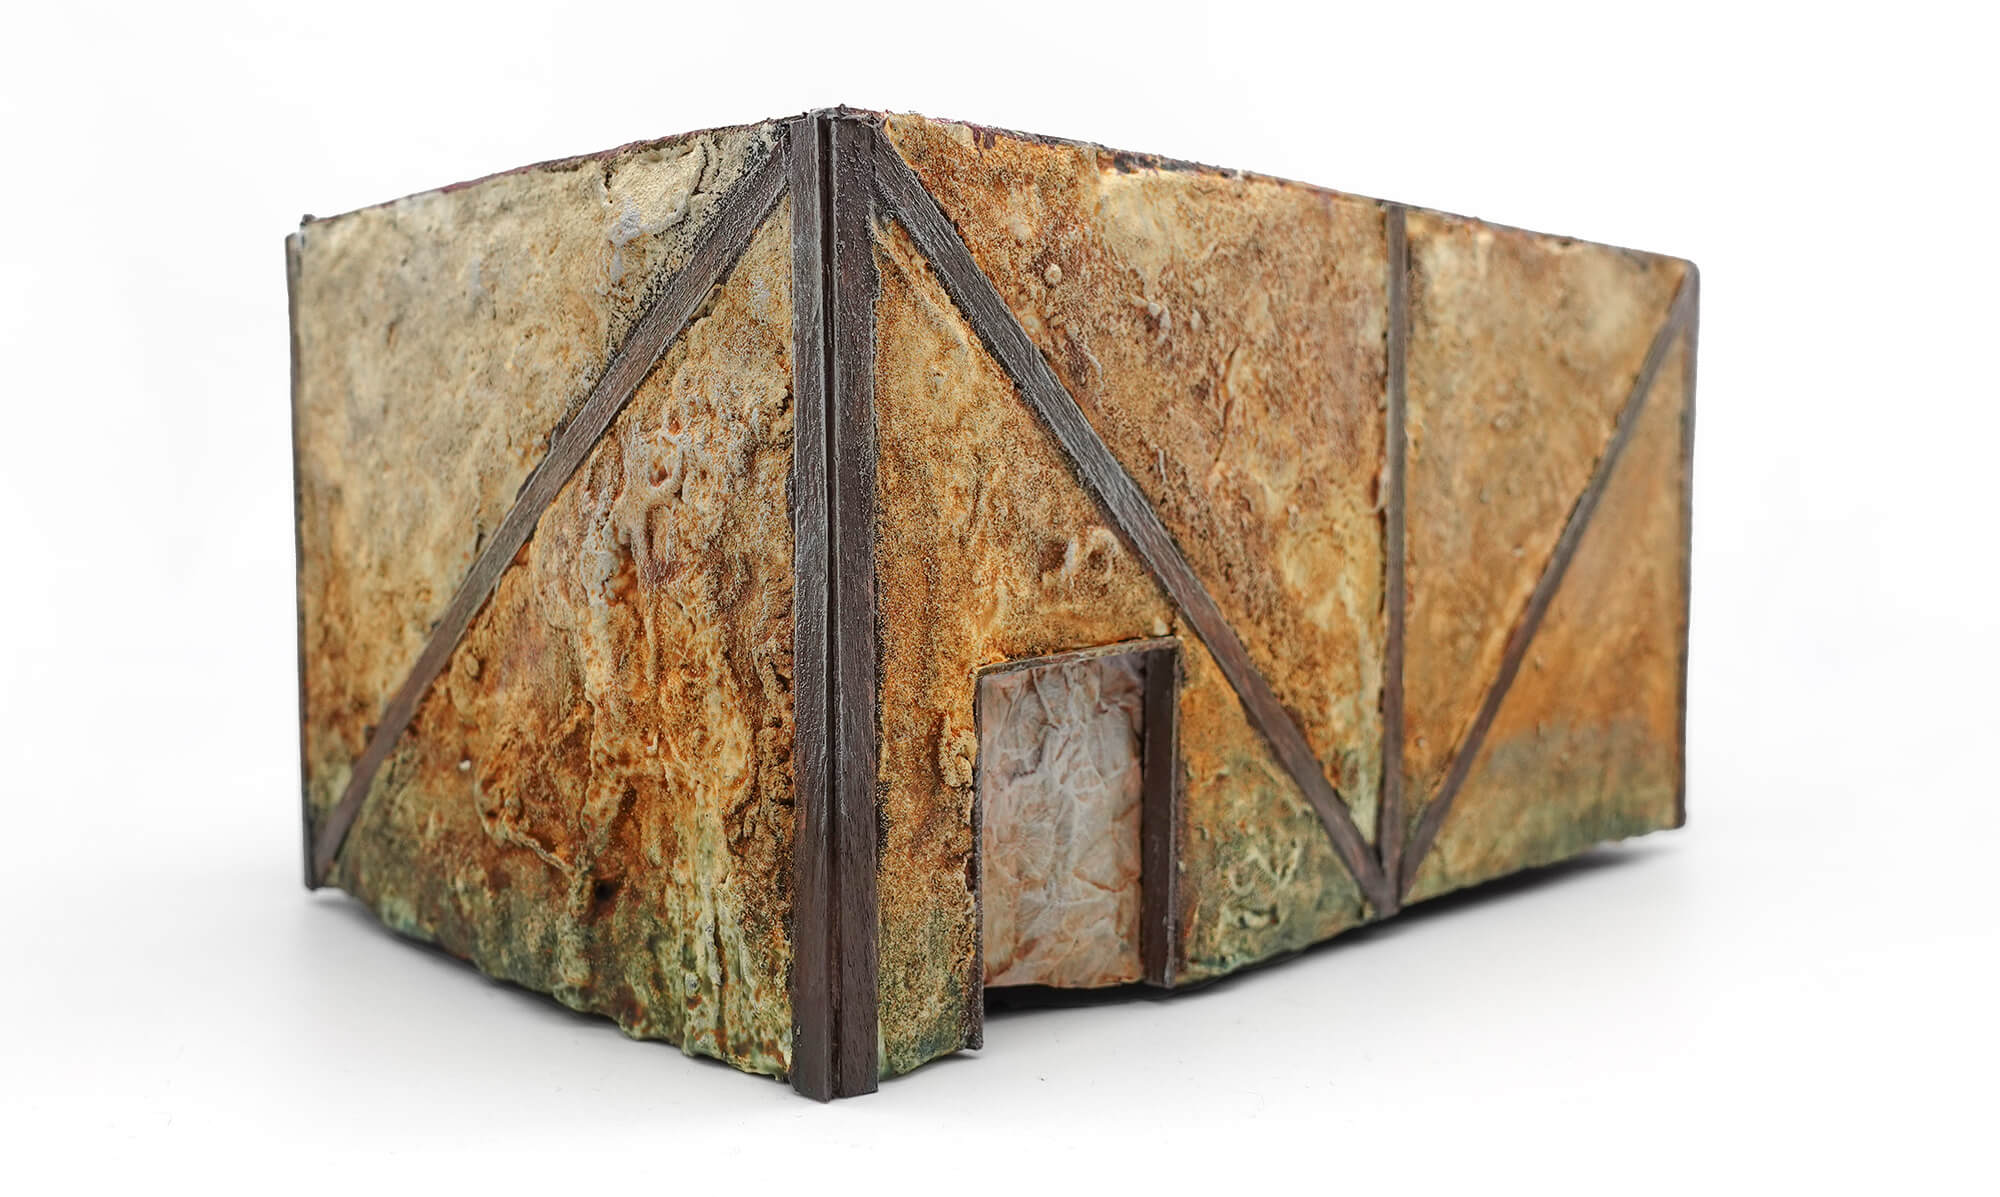
- Tear and crumple a piece of paper, then slightly flatten it out to serve as a cloth covering for the back door
- Use PVA to glue it on the inside of the back doorway
- Brush the outside of this piece of paper with PVA
- For the flat roof, cut another piece of cardstock from the snack/cereal box to the dimensions of the structure
- Adhere it to the top of the walls with tacky glue
Outside Walls & Roof Textures
- OUTSIDE WALL TEXTURE
- With a large paintbrush, coat the outside walls of the tavern in PVA glue
- Sprinkle baking soda all over the wet PVA
- I paid extra attention to the corner with exposed corrugation since I wanted this area to look in particular disrepair
-
-
- Wipe away any excess baking soda that got on your exterior bracing slats
- This will need to dry overnight
- After completely dry, brush away excess baking soda with a dry paintbrush
- You can keep this leftover baking soda to use for your next project to save some cash
-
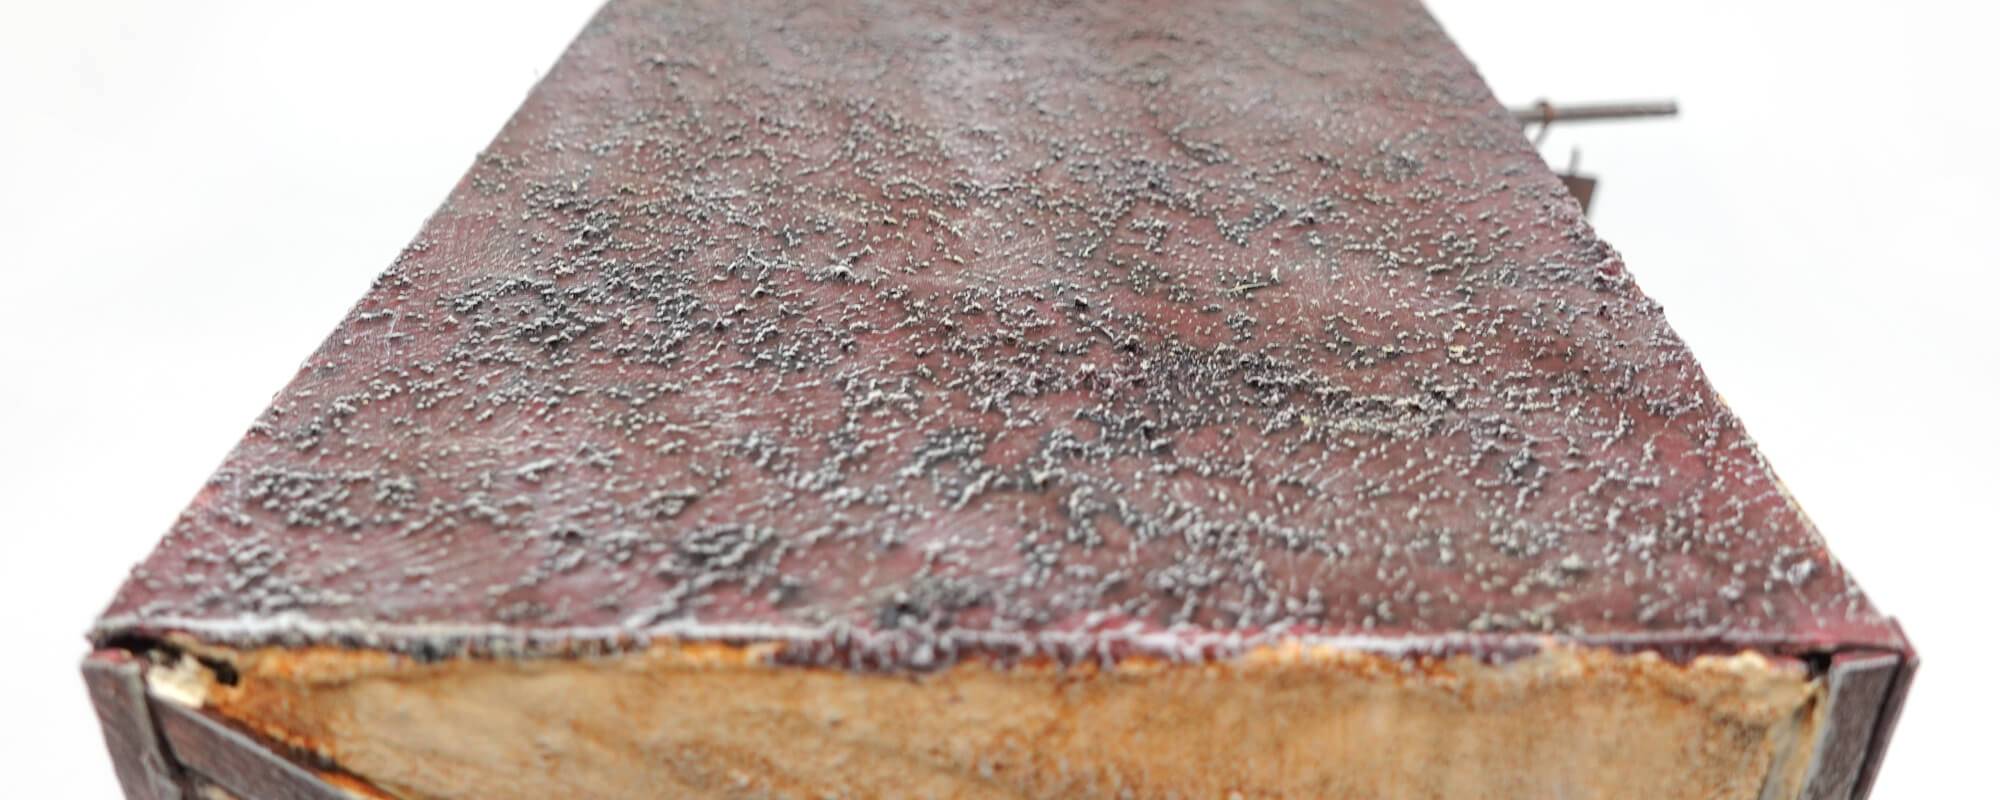
- ROOF TEXTURE
- Use a paintbrush and a stippling method to apply Vallejo Black Lava to the roof
- Any texture here is fine, but stippling Black Lava provides a look that suggests a roof that would require minimal upkeep from the tavern owner or builder
- The color isn’t terribly important either because we’ll be painting over it
- Use a paintbrush and a stippling method to apply Vallejo Black Lava to the roof
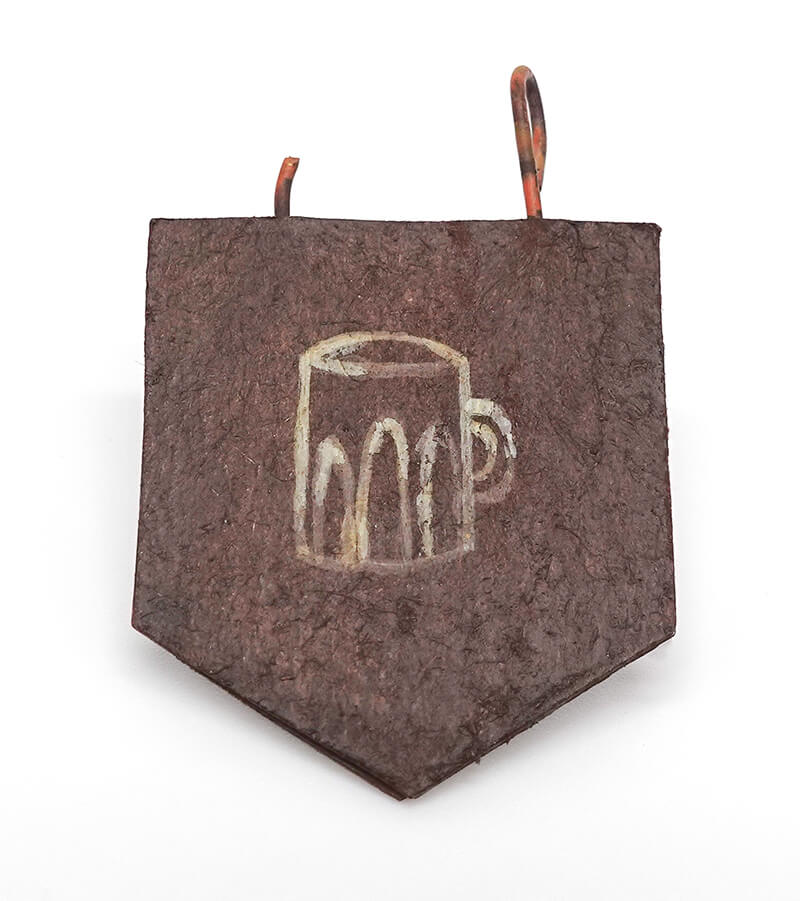
Sign
- Cut two more pieces of cardstock into identical shapes
- For ease, the instructions will assume you chose the same shield shape that I did
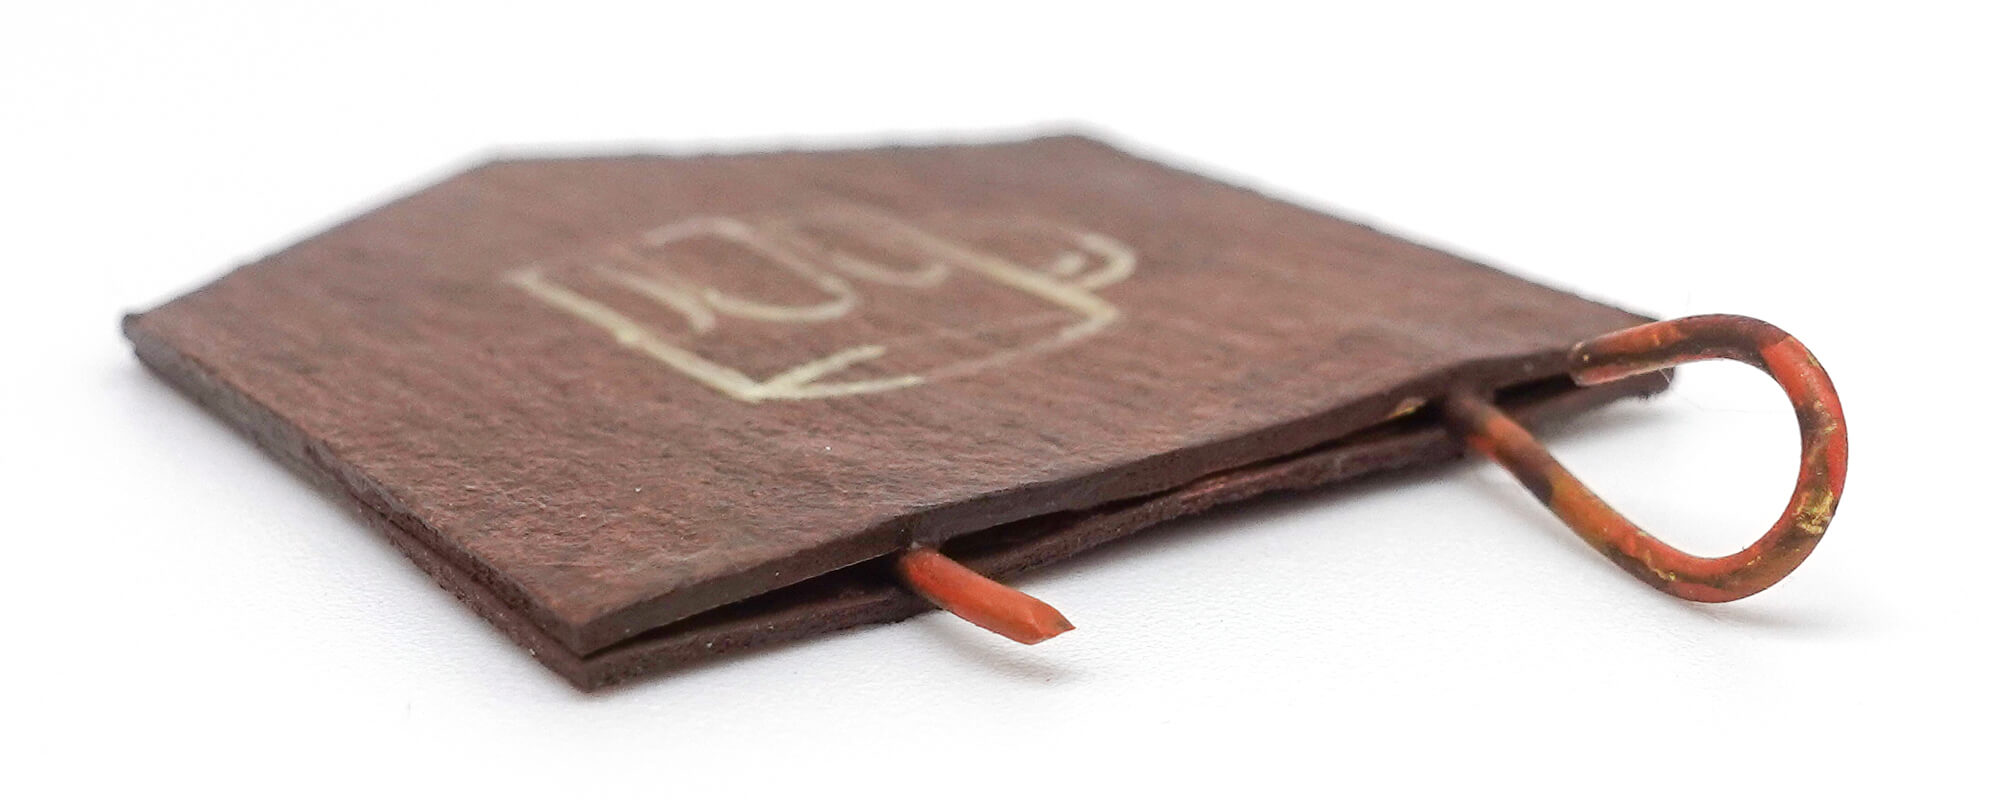
- Cut a short length of brass wire
- Curl one end of the wire around a brush handle, making the piece into a question mark shape
- Cut a second, shorter length of wire to be the broken hook
- If the cardstock you’re using has print on one side, make sure those are the sides you glue together in this next step
- Sandwiching the brass lengths of wire between the two identical shapes of cardstock, glue the cardstock together with Zap-A-Gap
Painting
- Since terrain can require a lot of paint, I recommend using a paint spray can of any darkish brown/green color and giving the walls a healthy coat
- This color will be nearly fully covered in future steps and is just to give the following paints something to stick nicely to
- When that dries, use a cream-colored craft paint to hit the baking soda sections of the exterior walls, as well as the “cloth” covering the back door
- All the wood gets a coat of Ebony, from Huge Miniatures
- The roof gets a coat of Brick Red, also by Huge Miniatures
- The sign and its brass bits get a coat of Army Painter’s Oak Brown
- Take some water and apply it with a paintbrush to the top half of all the exterior walls
- Then apply Citadel’s Seraphim Sepia from bottom to top in turn for a nice, messy fade
-
- The “cloth” covering the back door also gets some Seraphim Sepia
- Apply a heavy dose of Dark Wash, by Huge Miniatures, to the roof, all the wood, and the doorknob
- Adding spots of Huge Miniatures’ Terracotta and Camel Tan to the brass bits of the sign simulates rust
- After the exterior walls are completely dry from the water/Sepia fade, add Citadel’s Poxwalker to the very bottom of the exterior walls, quickly using your thumb to smear the top half of it upward to create a quick gradient and smear (see photo above)
- When the walls are dry again, drybrush the top half of the walls and the roof with Huge Miniatures’ Pale Rose
- Camel Tan paint can be used to create text—or a beer mug in our case—on the sign to indicate what type of building it is
- Once that is dry, give the wooden part of the sign a coat of Huge Miniatures’ Flesh Wash
- Give the bottom third of the sign a second application
- When the Flesh Wash is dry, add some Pale Rose accents to the mug
- Once that is dry, give the wooden part of the sign a coat of Huge Miniatures’ Flesh Wash
- A final drybrush on the roof and top third of the building with Citadel’s Grey Seer gives our tavern the final touches it needs
Now our tabletop tavern is ready to hit the table so we can slam back some brews with the party until an adventure breaks out!

The construction of the tabletop tavern and the build steps were done by Steve “Stevil” Lemberg, one of our Miniatures Masters here at Noble Knight Games!
[ Read more Just For Fun articles ]
[ Browse all Miniatures & Games ]
[ Shop for Paints ]